Making the decision to start a blog is easy – but it comes with challenges. How do you actually start a blog? And where should you start? As your to-do-list becomes longer and longer, you’ll need a plan.
And this is exactly what I’m offering you – a guide on how to start a blog step-by-step – for beginners.
If you already started and got lost on the way, no problems. Take a look at the table of contents and jump on the step you’re at. If you’re starting from scratch, keep reading.
Decide on Your Blog Topic
The first thing to do is to brainstorm ideas. What do you want to blog about? The idea here is to pick a niche that interests you, that people are interested in and that isn’t too competitive. So, let’s see how you can find a blog topic.
To brainstorm ideas for your blog, here are some questions you can ask yourself. I invite you to write down all your ideas without judging them.
- What are you passionate about?
- What are your three main interests?
- What can you help people with?
- What are you an expert about?
Once you come up with a list of ideas, you can go through the list and pick the ones that make the most sense to you.
Now, the next step is to see if this topic is popular enough to create a blog about it.
There are a couple of ways to go about this.
The first way is to head to Google and search for your topic + blog.
For example, if your topic is crafting with kids – you could search for “crafting with kids blog”.
Right below the search bar, you’ll see a number of results which means it’s quite a popular topic.

You can click on results and investigate more about these blogs.
- Are they missing something?
- Do they display ads from Mediavine or Cafemedia? (I’ll get back to this further, so keep reading.)
- Do you think you could create better content about this topic?
- Is this topic too generic or should you go for something more specific?
The idea here is to find a topic that is not well covered yet, or a topic you know you could do better.
For example, when I first started Nomad Life 101, I knew that the digital nomad niche was already popular, but I felt like there was a lack of transparency and nothing aiming for real beginners. I thought I could deliver better content than my competitors and this is why I started this blog.
Regarding the ads, it’s easy to spot. Usually, a website that is affiliated with an ad system will have a pop-up for GDPR or you can scroll down the page and see that the blog is a member of an ad network.
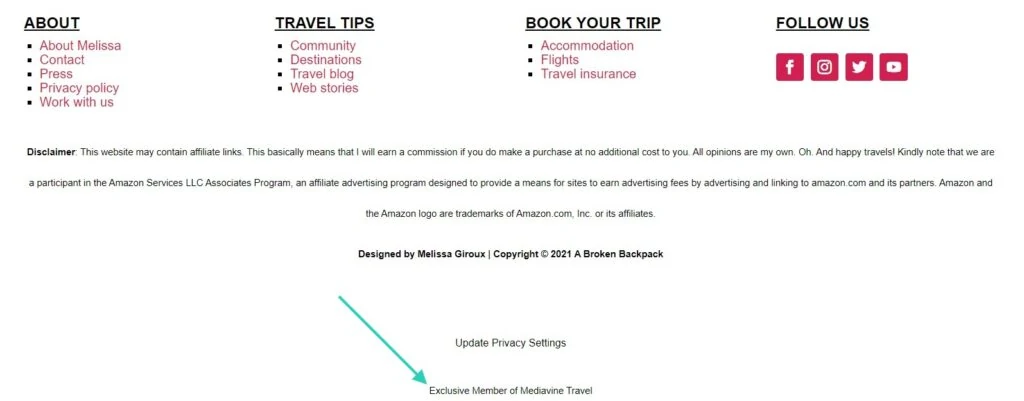
It’s interesting because to join these ad networks, you need a minimum of traffic. (50,000 sessions or 100,000 sessions depending on the ad network). It’s a great way to see that a niche has the potential for traffic.
You simply need to keep in mind that as you’re starting your blog, it will take time to reach this kind of traffic, but it’s a good indicator of the niche.
Finally, you could also become an expert about something very specific. Nowadays, niche sites (very specific websites) can do very well without an enormous amount of traffic. If the topic is targeting a specific audience, you could still manage to do very well within the niche.
For example, having a blog in a language other than English would mean the competition is probably lower. Or, having a blog about one destination instead of a generic travel blog could help you get results faster.
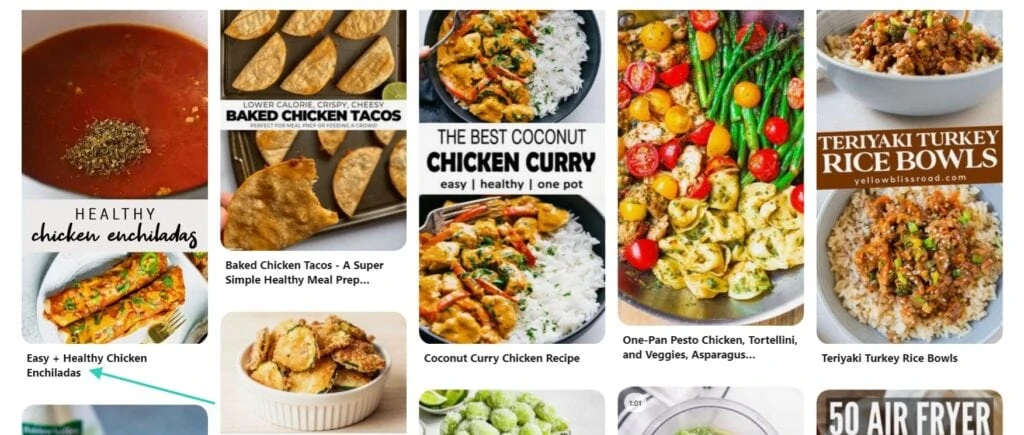
The second way to find out information about a topic is via Pinterest.
Many bloggers get blog views from Pinterest – it does work well for certain niches like food, home design, craft activities, etc.
To get started, you simply need to head to Pinterest and write your topic in the search bar. At first, you could keep it more generic.

For example, you could write healthy recipes. The page will reload and show results including tiles at the top. By clicking on one of these tiles, you are getting more specific. So, I could click on “delicious healthy recipes”. And then on “vegetarian”. You get the idea.

The results are pins and are linked to blogs. By clicking the pins, you can take a look at the blogs within the niche and see if you think you could do better.
There are other ways to evaluate the competitiveness of a niche – by doing keyword research. Although, this is part of an SEO strategy and if you’re just starting with blogging, you probably don’t know what this is yet. That said, there’s no need for SEO just yet – as long as you think you can provide better content than your competitors.
Pick a Blog Name
Picking a blog name is an important task – the idea here is to find something catchy, easy to remember, and related to your blog topic.
For blog name ideas and more details on choosing your blog name, make sure to read our article on how to pick a good blog name.
Here’s how I usually decide on a blog name. (I own several blogs which is why I have a process to pick a name.)
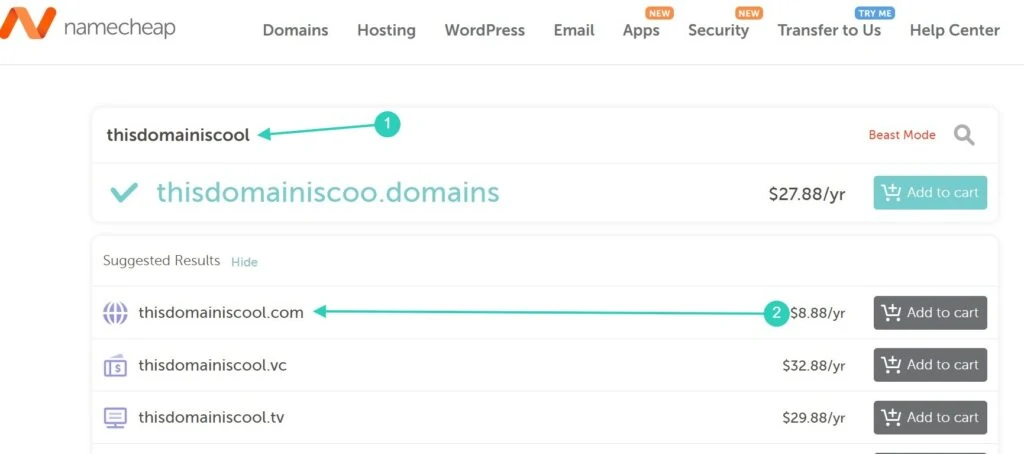
Step #1: Click on this link to see if a domain is available. This link goes to NameCheap – a marketplace for buying domains. Although I usually don’t buy my domains there – it’s a great tool to see which domains are available. (Note: I own one domain with NameCheap that ends with .ca)
Step #2: I open a Google Document file in which I’ll write down all the available domains.
Optional step: I do quick keyword research to see if there’s a way to optimize my domain. You can learn more about this in the article mentioned above.
Optional step #2: Open a few name generators to get more ideas. A quick Google search should suggest brand name generators that are easy to use.
Step #3: I enter all the ideas on NameCheap and see which ones are available. When you can, use the .com version unless you want to focus on a specific location.
For example, I have a .ca website that focuses on Canada only, so it made sense to have a Canadian domain.
Step #4: Write down all the available domains found on your Google Document.
Step #5: Go through the list, and delete the ones you don’t like.
Step #6: Ask someone which ones they prefer to shortlist a few.
Step #7: With your shortlist in mind, look if these names are available on social media. Quickly search on Instagram, Facebook, Youtube, or any social media you intend to use.
If they are unavailable, you could always make a different version like @nomadlife101blog instead of @nomadlife101.
If your name is not available, remove it from your shortlist.

Step #8: Wait for 24 to 48 hours, and pay attention to the domains you remember clearly. These are the ones that are catchier. This means they are easy to remember too.
Step #9: Pick a brand name.
And there you go, you’re one step closer to get your blog started.
Choose a Blogging Platform
Now it’s time to look into blogging platforms.
A blogging platform is basically a system that allows you to create a website including pages, and blog posts. It’s presented in a dashboard and it’s usually easy to use. We call this a content management system.
You should know that there are several blogging platforms out there. Let’s take a look at the popular ones:
- WordPress
- Blogger
- Wix
- Squarespace
Now, I can’t speak for all of them since I only have experience with WordPress, but most bloggers recommend using WordPress for several reasons.
- WordPress is more flexible when it comes to customization.
- WordPress is better for SEO.
- WordPress is the most popular blogging platform which means there are more themes, plugins, and options to link your accounts via WordPress.
- WordPress is easy to use.
My main recommendation to you is to build your blog using WordPress.
Now, you should know that there are two ways to go about blogging.
You can either go with a free blogging platform or go self-hosted.
A free blogging platform is ideal for hobbyists. If you intend to make money blogging, do not use a free platform.
Why?
The free blogging platforms including WordPress.com are not meant to be used by professional bloggers who earn money from their blogs.
If you’re serious about blogging, you should go for a self-hosted solution. So, let me explain.
When you use the free version of WordPress, your blog is hosted on WordPress’s own server. That means you don’t have full control over your website.
Having a self-hosted website means that you need to set up everything yourself, but you’ll be in full control over your website. That said, you’ll be able to monetize, design your site the way you want it and you can do whatever you want with your blog.
To get a self-hosted blog, you must purchase a hosting plan. The hosting plan means you’ll get your website hosted on a server. Don’t worry, these plans are usually cheap and they allow you to install WordPress with just one click.
So, let’s see how you can purchase a hosting plan and your domain in the next step.
Purchase a Hosting Plan and a Domain
It’s now time to take one more step into your blogging journey – getting a domain and a hosting plan.
The best way to go about it is to buy both your domain and hosting plan together.
If you do decide to buy them separately, it can get complicated since you’ll need to transfer your domain to your hosting company and that’s a nightmare.
This is why you should buy them both together – no headache needed.
Most new bloggers opt for Bluehost – which is a hosting company. I, myself, host most of my websites on Bluehost. Here’s why:
- It’s one of the most affordable web hosting companies. Their plans are just a few dollars per month.
- The support team is great and available via their live chat.
- You get a free SSL certificate. (This certificate enables your site to move from HTTP to HTTPS, which makes the connexion more secure.)
- You get free access to Cloudflare. (This helps your website performance and speed).
- You can install WordPress with one click.
- You get a free domain for the first year.
- You can host multiple websites under one plan with the PLUS plan.
You can also take a look at other web hosting companies such as…
- Siteground
- Big Scoots
- NameCheap
If you’re happy with Bluehost, then just click here to get started.
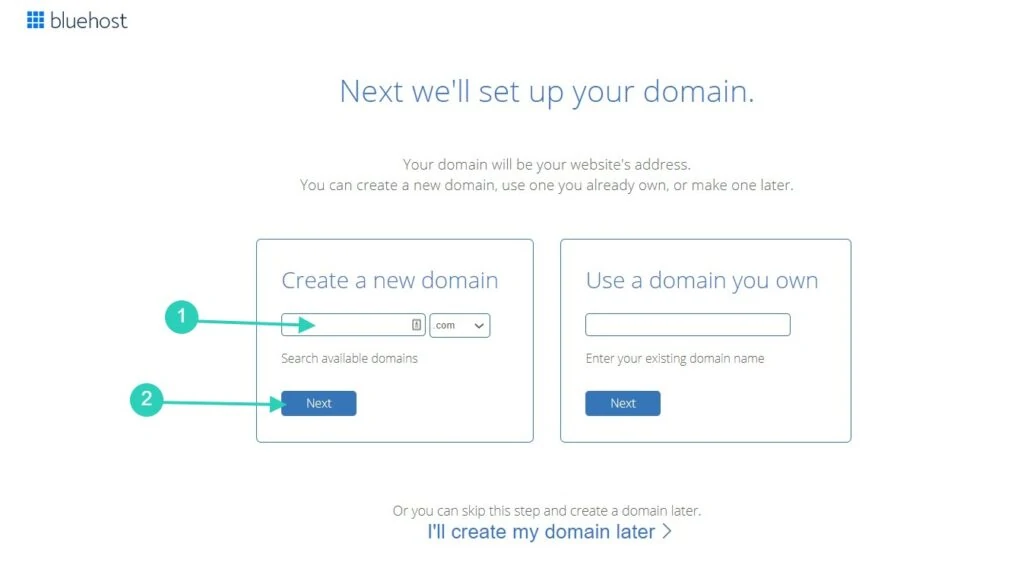
If you can opt for the basic plan, which allows you to get started with one website. At the top, you can select different plans from 12 months to 36 months.

You’ll see that the prices can differ depending on the plan chosen. You’ll get a decent discount by opting for the 36-month plan.
Select the plan that suits your needs and write down the domain you chose.
The page will reload and you’ll have to enter your information. You’ll see a section that includes extras.
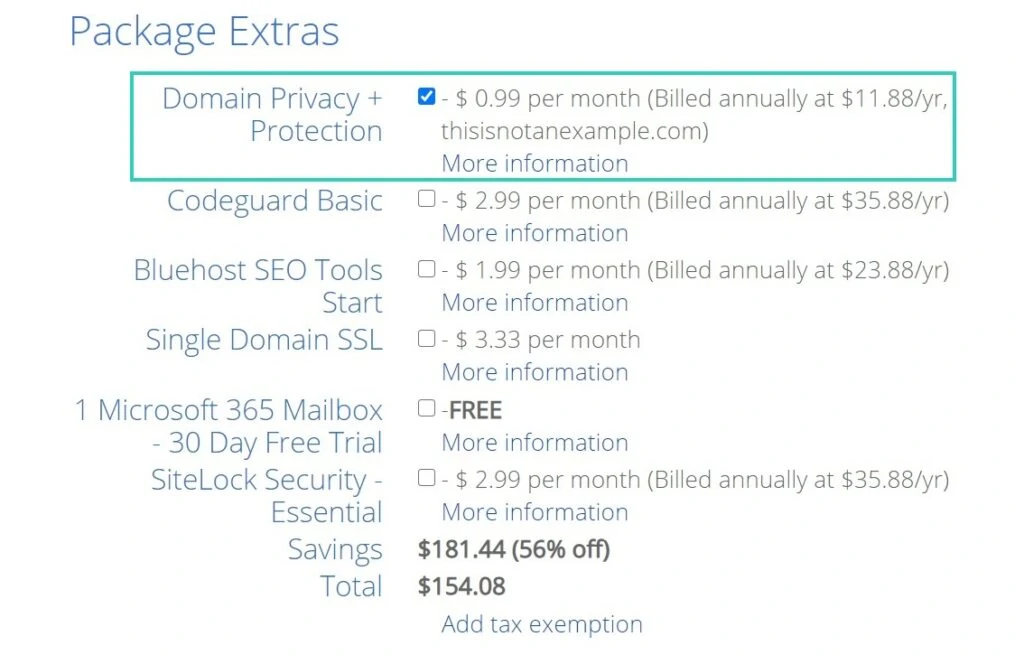
I personally only pay for the Domain Privacy + Protection. It basically means that your private information won’t be shared in Bluehost’s public records. If you don’t pick this option, you can expect to get hundreds of emails from strangers who want to design your website or offer web services.
At the bottom of the page, you can enter your payment details and add checkmarks like what you accept the terms and conditions, etc. Finally, you can click the button that says “Submit”.
Install WordPress
Once you purchased your domain and hosting plan, you’ll land on your dashboard and you’ll see an option to install WordPress.
During this process, you’ll see an option to pick one theme. I’d suggest skipping this step. There are better premium themes you can purchase which offer more flexibility when it comes to customization.
If you don’t wish to spend money on a theme, you could then pick one of the themes suggested.
You’ll see different options including plugins (WordPress extensions appear) – you don’t need any of the ones suggested. But you can always remove them later.
Although, before you jump to the next step, there are a few things you should be doing.
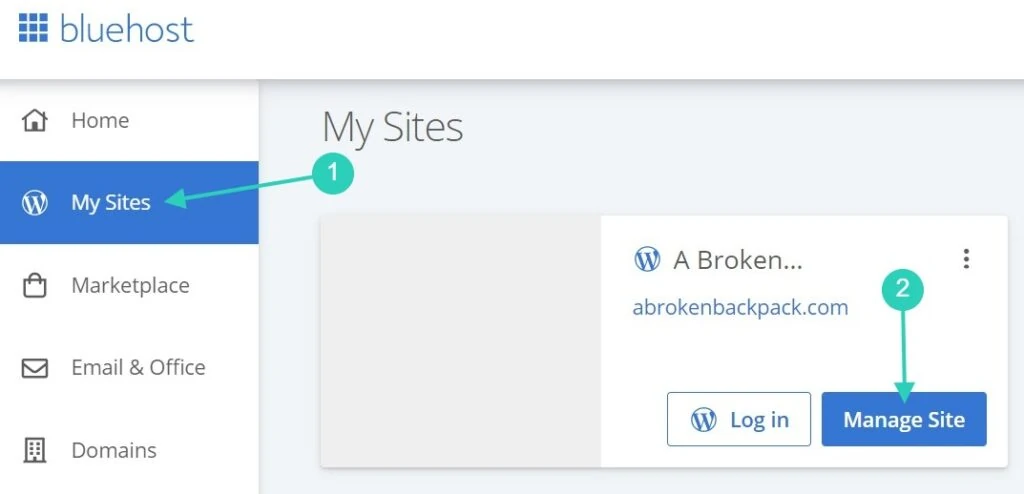
In your Bluehost dashboard, click on My Sites > Manage Site.
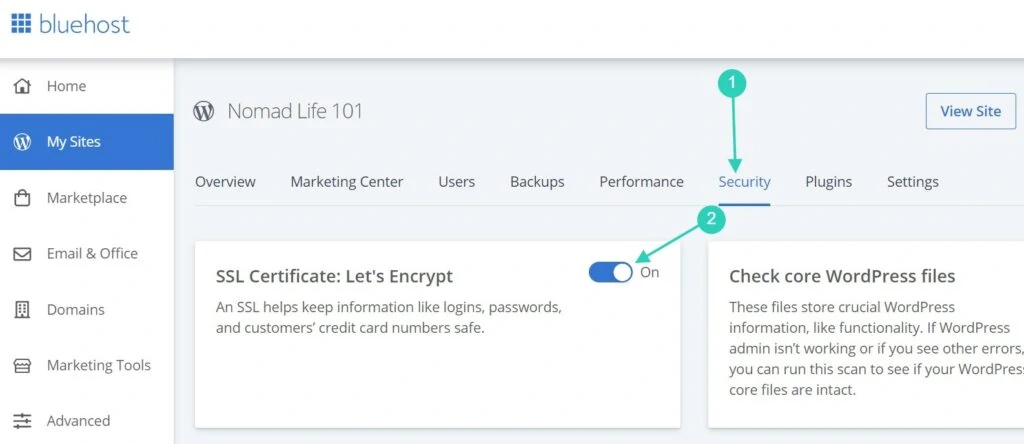
Then, head to the Security tab.
Make sure to enable the SSL certificate to make your website more secure. It may take a few hours before you can access your website again while the Bluehost team sets it up.
Also, while you’re at it, go to the Performance tab and select Cloudflare. Make sure it’s set for Blog.
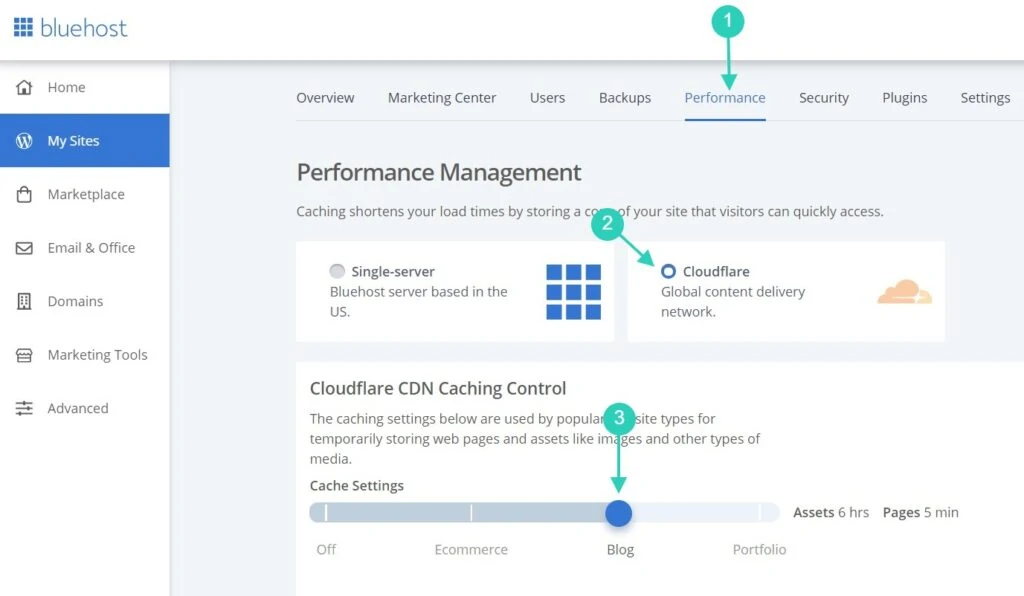
By enabling these two things, you’re setting up your blog for success – expect a faster and more secure website. It’s better to do it from the beginning to avoid any complications later on.
Now, let’s see how you can install a theme (a design template) to your WordPress dashboard.
Install a Theme
A theme is basically a tool that allows you to customize the layout and design of your blog. Some themes are already predefined, and some others are drag and drop builders that include tons of features.
I personally chose Divi by Elegant Themes. You can read this detailed guide on how to install and set up Divi.
All my websites are made with Divi. I like it because…
- Divi comes with premade templates.
- You can drag and drop different elements to design your website.
- It’s easy to use.
- I can buy a lifetime license and use it on multiple websites.
Some other popular themes would be:
- Elementor
- Astra
- Flatsome
- Generatepress
Once you purchase a theme you like, you’ll need to download the ZIP file. Then, log in to your WordPress dashboard.
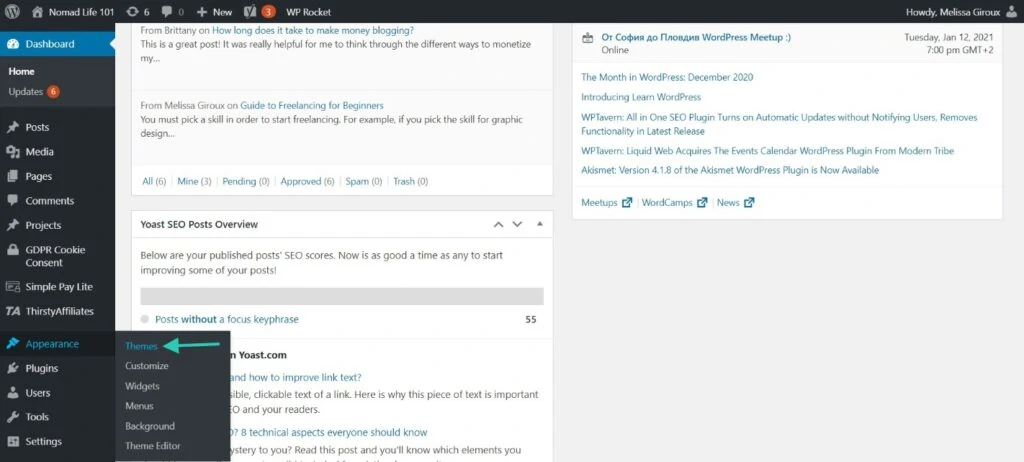
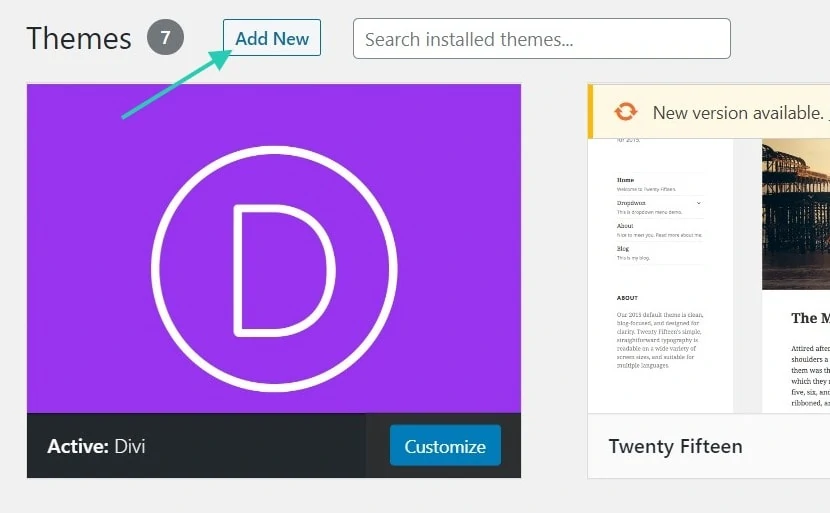
Take a look on the left sidebar and click on Appearances > Themes.
At the top of the page, click on Add New.
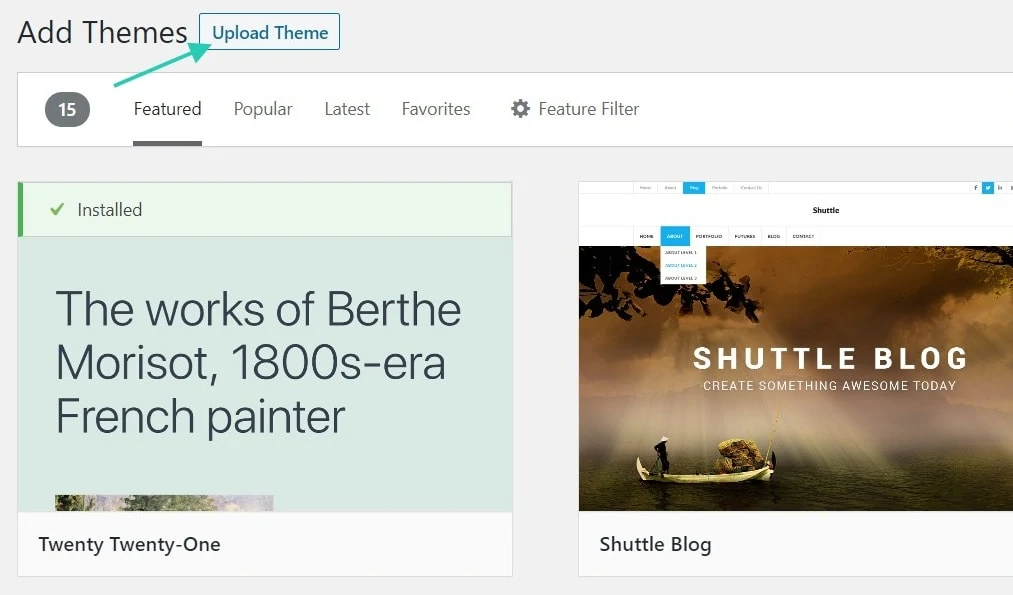
On the next screen, you’ll find an option that says Upload Theme. You simply need to pick the zipped theme folder you previously downloaded and add it there.
Depending on the theme chosen, you may have different things to set up. If you picked Divi by Elegant Themes, head here to see how to set up Divi.
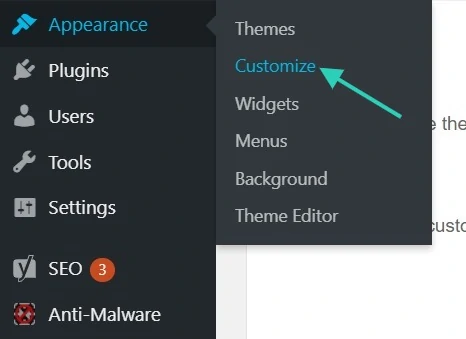
You’ll be able to customize your blog by clicking on Appearances > Customize.
Set Up the Basics
Once you set up your theme, there are a few important things you should do before you start publishing content.
The idea here is to set up your basics the right way so you don’t need to handle complications in the future.
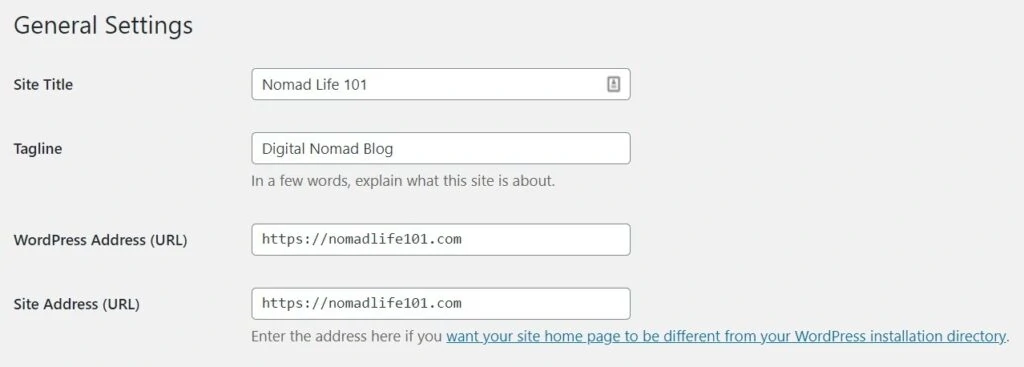
Head to your WordPress dashboard, and on your left sidebar, click on Settings.
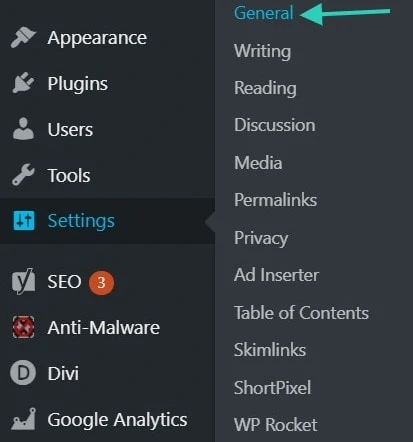
You’ll land on the General Settings page.
If you set up your SSL certificate the right way, you should see that your website URL includes the https version.
Make sure to write your Site Title and tagline there.
Here’s an example:
Then, head to the third tab Reading. Here, you can select the option for a static page for your homepage. You’ll be able to change this once you have pages published. The idea here is that your homepage should be a place where your readers can easily navigate and find the things they’re looking for.
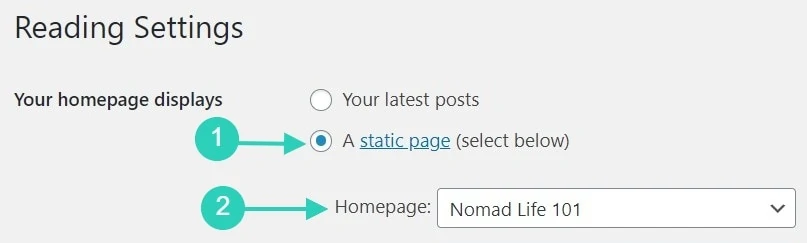
Creating a static page gives the readers a better experience. If you don’t have a home page yet, don’t worry, you can come back to it later. It’s just important to know where to find this option.
Here’s a screenshot of my current settings:
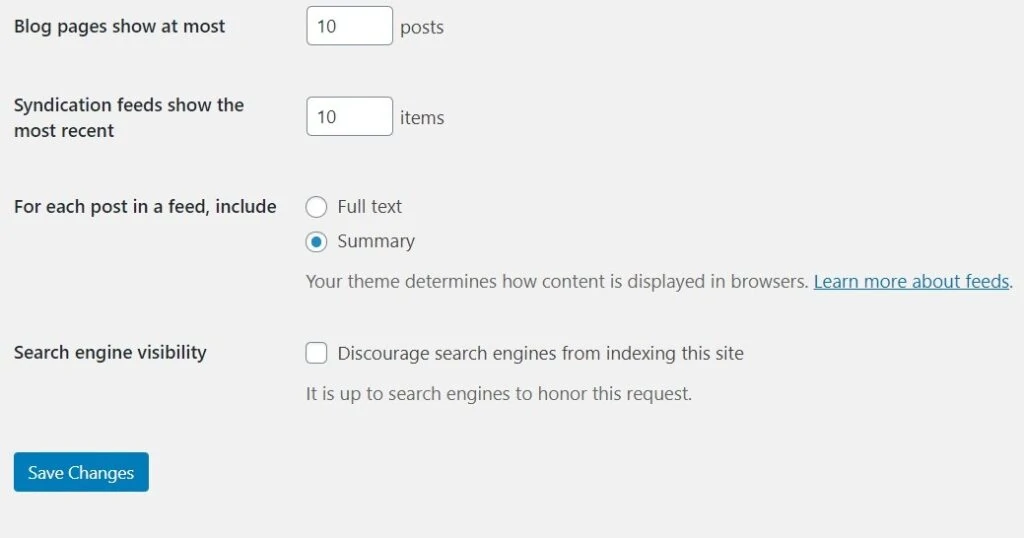
Head to the Discussion tab to set up the comments option. If you allow people to comment on your blog, make sure to disable the avatar display at the bottom of the page because this option can slow down your website.
I personally removed the comment sections on all my websites to speed up my site, but most bloggers allow comments.
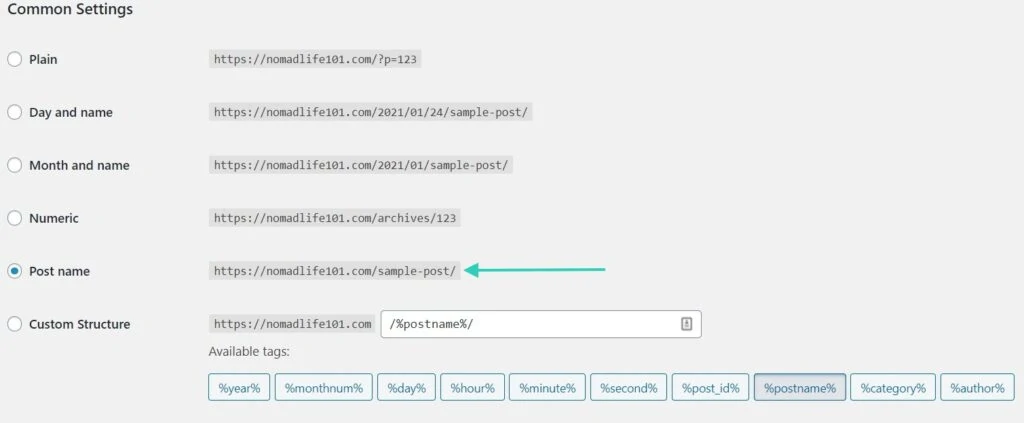
Head to the Permalinks tab, and select the Post name option. You could also pick other options, but make sure to not choose an option with dates.
Now, you’ll need to set up other things. So, let’s install some WordPress extensions.
Install Plugins
A WordPress plugin is like an extension that adds new functionality to your website. Note that you should not have too many plugins because it can dramatically slow down your website.
Also, plugins can be in conflict and create some kind of bugs or errors – so try to keep it simple if you can.
To help you find the right plugins, you’ll find the ones I use on all my websites below. It’s possible that your hosting provider added plugins during the WordPress installation, you can remove the ones you don’t intend to use.
Click on Plugins to see your current plugins and click on Add New to install a new plugin. You can search for plugins via their search bar or upload one that you previously downloaded.
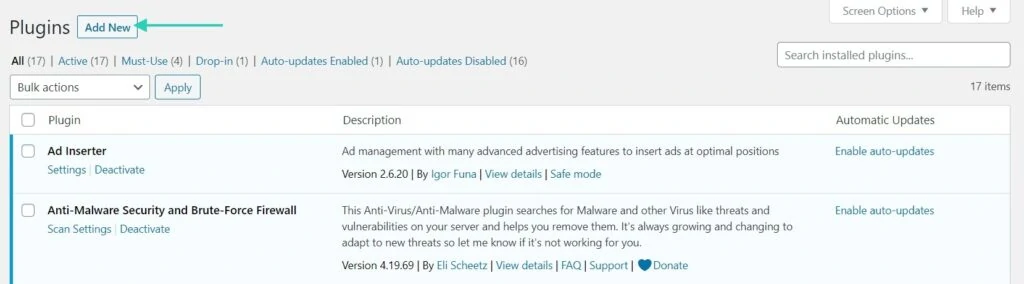
Note that every time you add a plugin, you’ll need to activate it and possibly set it up. You’ll see new tabs appear on your left sidebar.
Ad Inserter
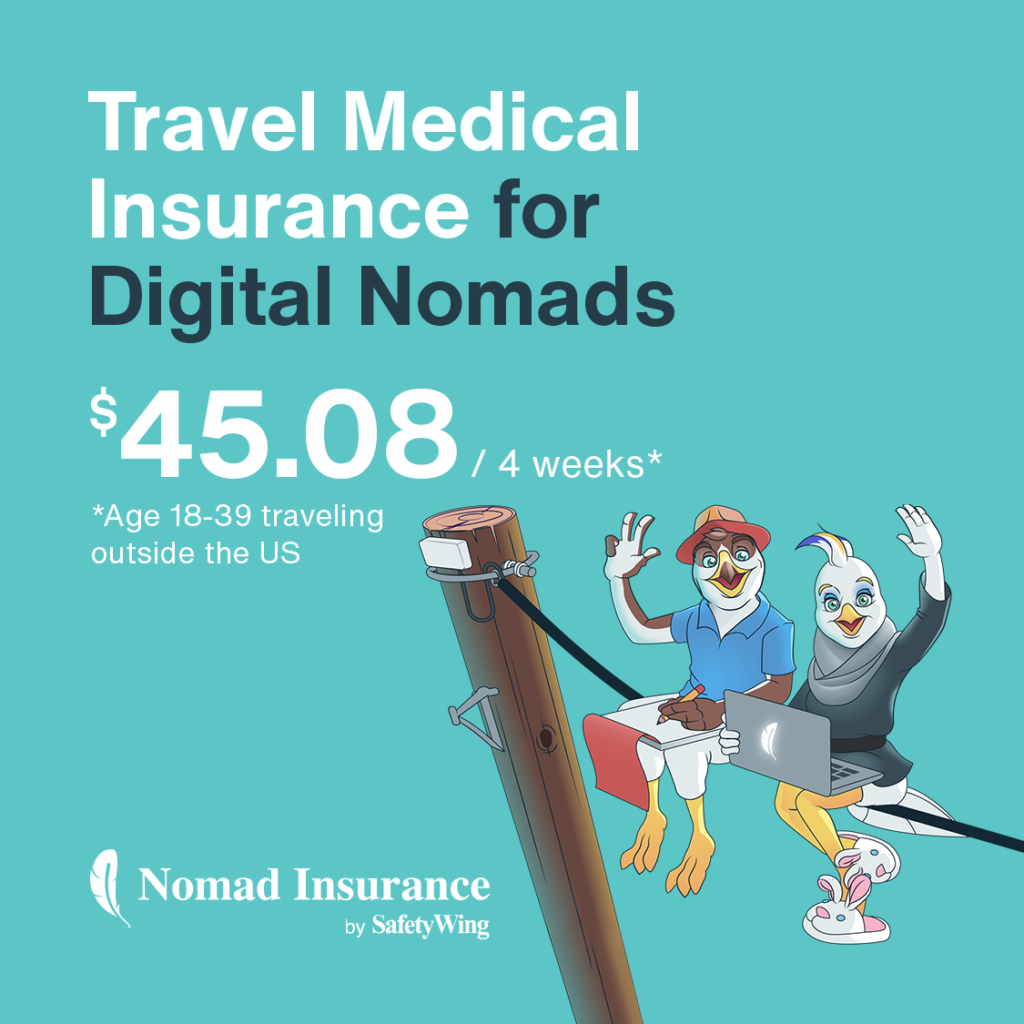
Ad Inserter was created to help people add ads across their website. Although, I use it to add content across my website. For example, at the end of each blog post on Nomad Life 101, there’s a box about travel insurance.

Ad Inserter inserts this text automatically for me.
Anti Malware Security and Brute-Force Firewall
This plugin helps you deal with malware or virus and helps you remove them. In the past, my main website was hacked and since then, I used this plugin and never had any problems. I’m not sure if it does help – but since I never got hacked again – I guess it does.
GainWP Google Analytics Integration for WordPress
This allows you to add your Google Analytics tracking number so you can see your stats quickly without having to add any codes manually on your website.
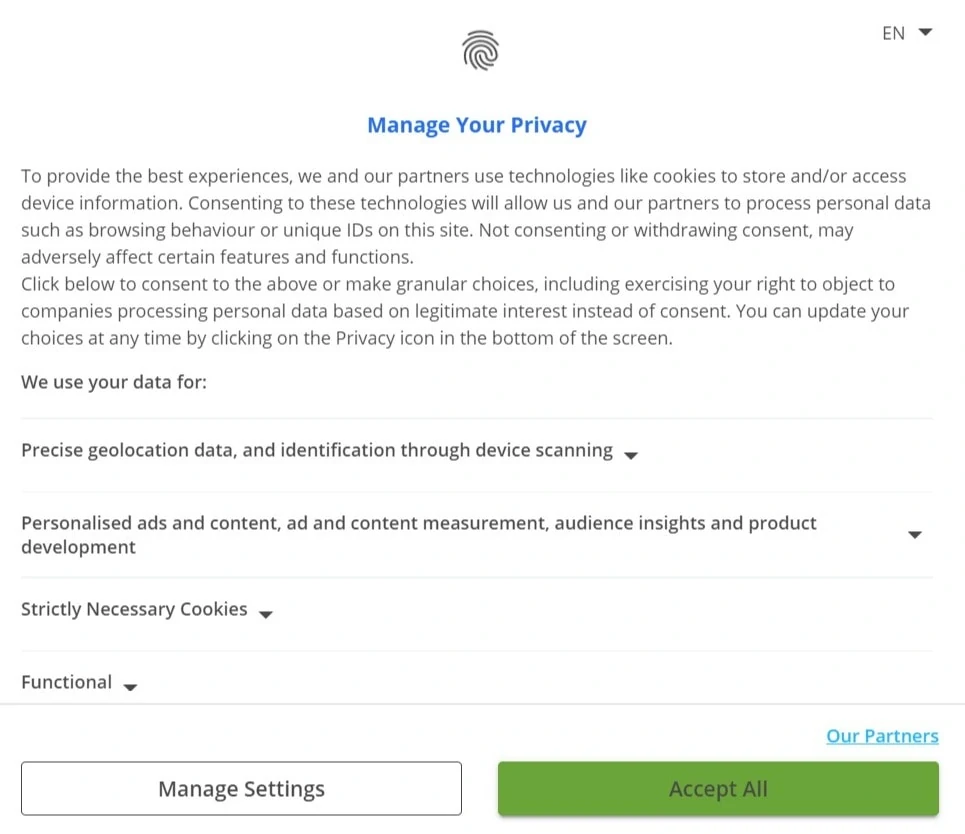
GDPR Cookie Consent
This plugin adds a Cookie consent bar that complies with the European cookie law (GDPR).
LuckyWP Table of Contents
This plugin creates a table of contents for your blog posts automatically and it helps your results stand out on Google. See the example below:

Redirection
This plugin helps you manage your 301 redirects or 404 errors. That said if a page no longer exists you can redirect it using this tool.
Rename wp-login.php
This plugin allows you to change your login page. Usually, WordPress creates an automatic version that says yourwebsite.com/wp-admin. That said, anyone could try to log in to your WordPress dashboard using this URL.
You can create a different name for your login page with this plugin.
For example, you could create yourwebsite.com/no-crazy-users. This way, nobody would know your login page.
ShortPixel Image Optimizer
This plugin allows you to optimize your images automatically. You can take the free option or opt for a paid version if your website has lots of images. This would help with the speed of your website.
ThirstyAffiliates
This plugin helps you manage your affiliate links. In short, affiliate marketing is a way to monetize your blog. Usually, you get special links with your partners so they can track sales and your commissions. By using a plugin like ThirstyAffiliates, you can change your links quickly and automatically.
WP Rocket
WP Rocket is a paid plugin which you’ll need to sign up for so you can upload it manually to your WordPress dashboard.
This plugin helps you increase the speed and performance of your website. Once your website gets bigger and heavier, this plugin becomes essential.
Yoast SEO
This SEO plugin allows you to add special titles and Meta descriptions for your content so they can be optimized for search engines. It includes other features too.
Now, let’s switch to something else – before we start creating pages for your blog.
Create Social Media Accounts
It’s time to create social media accounts for your blog. Note that even if you don’t intend on using them all, you should go ahead and create accounts to avoid having people stealing the handles later.
In general, you should create an account on Instagram, Twitter, Facebook (page), Pinterest, and Youtube. Make sure to add a link to your website on each of these platforms.
Set Up Your Social Media Accounts
Even if you don’t intend on using all the platforms, you can still set them up – in a basic way.
Upload a photo, write a short description and create images for the cover photos if required. You can create images for free on Canva.
The idea here is just to get it started – no need to be active on the platform yet.
Create the Important Pages
Now, it’s time to write the basic pages of your blog. Here, I’m talking about the essential pages like:
- Homepage
- About page
- Contact page
- Privacy policy page
Obviously, here we are building the skeleton, you can always go back to it later to make it better.
To create a new page, head to your WordPress dashboard and click on Pages on the left sidebar. Click on Add New.

Let’s start with your homepage.
Depending on your theme, you may need to manually add it to your front page. Otherwise, once the page is created, go to Settings > Reading to change your home page to a static page as I mentioned above.
If you have a visual builder included in your theme, you should create your homepage using that builder. You can take a look at our homepage to see an example.
My website is built with the Divi theme – but I only use the visual builder to create the pages, not for the blog posts.
Your homepage should be easy to navigate and should include all the top sections of your website. In the beginning, your homepage may be shorter until you start publishing content. The idea here is to get the basic setup ready.
Your homepage should help your readers feel like they are in the right place and they should know where to go find the answers to their questions.
Once your homepage is finished, click on publish and make sure to set it up as your frontpage.
The next step is to create an about page. You can read our article on how to write an about page for more details on what to include on this page.
Then, you can create a contact page. I’d suggest inserting a contact form. Usually, themes offer a template for this.
Finally, you can edit the Privacy Policy page. You may already have a draft within your pages that is already autogenerated. Otherwise, in your settings, you could find a way to create it under Privacy. If it’s not there, make a quick search on Google, you’ll find plenty of free templates to use.
Now you already have four basic pages on your website. Note that you can always edit them in the future. The idea here is to have a basic version just so you can create a menu in the next step.
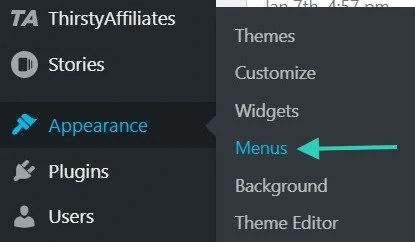
Create a Menu
Under Appearances, there’s an option for Menu. You can structure your menus there. Depending on your theme, you may have different menus including one at the top and one at the bottom. Some themes have three menus.
Select the menu you wish to edit and add the pages you just created within this menu. You can rename the pages for a short and quick overview by editing the Navigation Label. You can customize the menu with the function drag and drop.
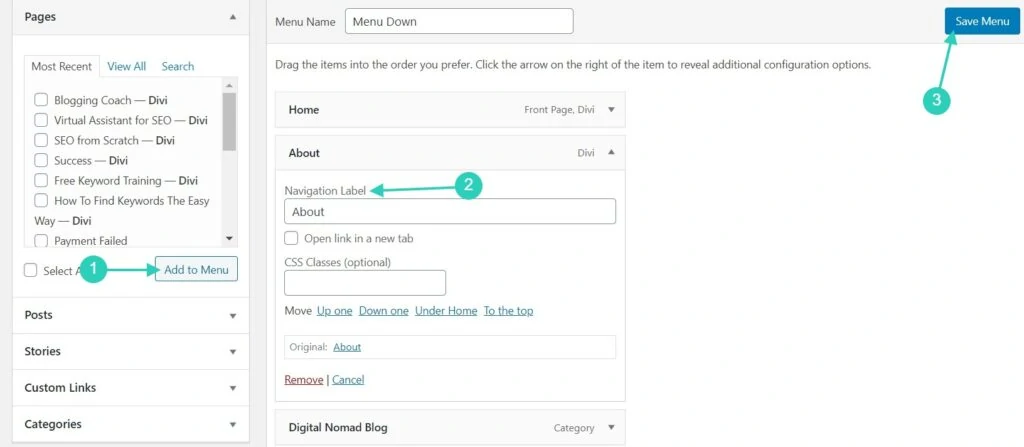
Make sure to save the menu and then head to your website to see how it looks like. You can customize it via the option Theme Customizer.
Note that you can always go back to your menu to add more pages as you publish new sections or pages.
Before we start working on your content plan, it’s time to set up your “business plan” and think of ways to monetize your blog in the future. You should know that monetization takes time, so don’t expect quick money. You can read more about how long it takes to monetize a blog here.
Think of Ways to Monetize Your Content
This is an important step and you should do it before you start planning your content strategy.
First, let’s see how you could monetize your blog in the future.
There are different ways to monetize blog content. Here are the most popular ones:
- Display ads
- Affiliate marketing
- Brand partnerships
- Selling services or your own products
Let’s look into them in more detail.
Displaying Ads
Displaying ads is my favorite way to monetize blog content. Although, I recommend choosing this option when you can reach a significant amount of traffic. Most well-known ad networks have minimum requirements for traffic (10,000 sessions, 50,000 sessions, or 100,000 sessions).
Until you reach this level, you should concentrate on creating valuable content for your readers.
Why?
Networks like Adsense won’t make you the big bucks anyway and ads can slow down your website – so there’s no need to add ads at the beginning.
Once you have enough traffic to apply for an Ad network, you’ll make more money and your ads will look better than the ones by Adsense.
Affiliate Marketing
Affiliate marketing is my second favorite. Basically, the idea is that you partner with a brand and you earn a commission for every sale or lead. You get a special link that includes a tracker that you insert within your content.
Finding affiliate programs is easy, although, some brands prefer collaborations with established websites (minimum 3 to 6 months). It’s the best way to monetize your content even if you don’t have a lot of traffic yet.
Obviously, the more traffic you get, the more sales you’ll make.
Brand Partnerships
A brand partnership is a mutual agreement between you and a brand. Usually, the brand will pay the content creator to promote them. To get this kind of collaboration, you’ll need to build influence amongst your audience.
Selling Services or Your Own Products
Many bloggers create digital products like eBooks, online courses, etc. Some bloggers also sell services to their audience including coaching or private calls. Selling your services is a great way to make money, but again, you’ll need the traffic to make sales.
Now, before you start creating your own products, the best way to start is with affiliate marketing.
It’s easier since your blog doesn’t require a big audience initially, and you can create your content with that in mind. Although, your website should provide value, not just affiliate links here and there.
As your audience grow and your traffic increase, you may be able to apply for an ad network and create brand partnerships.
That becomes a good opportunity to sell your own services or products too.
Thinking of ways to monetize your content is important because if you publish lots of content without a strategy, you’re just going to lose motivation and no return on investment. At the end of the day, if you are serious about blogging, you should have future plans for your content.
Create a Content Plan
During this step, the goal is to create a content plan for your blog.
Now, you should know that the best way to come up with a content plan is with keyword research. You can learn more about keyword research here.
Keyword research is basically the first step when it comes to SEO. SEO is a technique that bloggers use to get traffic from search engines like Google. I teach SEO in my online course SEO from Scratch but if you just want to learn the basics of keyword research, go and read this article.
There are two main types of blog content: information and money-making articles.
In simple words, information blog content provides information to the reader. For example, “how-to articles”.
Money making articles are written with the intention of making money. For example, reviews, comparisons, buying guides.
Both types of content can include affiliate links, but the second type is definitely more salesy.
When you create your content plan you should have your monetization strategies in mind. If you decide to opt for affiliate marketing, you’ll need to create content that includes affiliate marketing strategies in the future – here, I refer to money-making articles.
But first, let’s start with your main content – which should be informational.
So, let’s pretend your blog topic is about food. You should come with 2 to 4 content pillars.
You could have these 3 sections:
- Recipes under 20 minutes
- Recipes that your kids are going to love
- Recipes to do with your kids
As you can see, these 3 sections provide lots of information – we are targeting busy families who want to cook quickly, for their families and with their kids. Now, you can come up with blog post ideas for each section.
Eventually, you can start writing money-making articles under a new section:
- Cooking tools
In this section, you could have blog posts to review tools, essentials for busy families, tools that help you cook faster, etc. In this section, the readers will find plenty of affiliate links.
Now you should know that you can add affiliate links pretty much anywhere in both informational and money-making pieces. Although, the information content has one priority: provide value to the reader.
So, here the idea is to come up with lots of blog post ideas around your main topic and your content pillars. You should aim for 30 ideas. Obviously, you don’t need to stop writing blog posts once you’ve written these 30 articles.
It’s just easier to get started with a plan instead of having to come up with new blog post ideas every week.
Before you start writing and publishing articles, you may want to create a mailing list for your audience. It’s easy to set up, and once you have it, you can always go back to it in the future.
Create a Mailing List
Creating a mailing list allows you to collect emails from your audience. This way, you can promote your new articles with your newsletter.
That said, if you decide to create your own products in the future, a mailing list will help you get more sales.
I use both Convertkit and MailerLite for different websites. I think Mailerlite is easier to use though.
Depending on your theme, you should be able to connect your mailing list provider to your WordPress.
Usually, the provider offers different ways to connect your account to your site. You’ll find the options on your Email Provider dashboard.
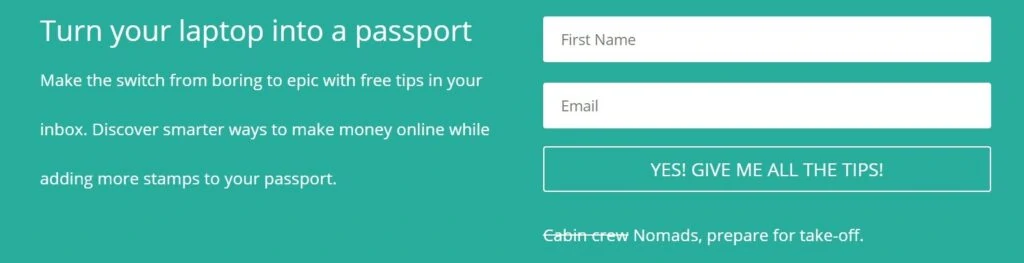
Here’s an example of how I invite my audience to become a subscriber.
Write a Blog Post
Finally, it’s time to write your first blog post. I personally like to write my blog post on Google Document first and then I copy/paste it in the dashboard. Although, you can write directly on your WordPress dashboard by clicking on Posts > Add New.
If you use the Classic Editor, you should see something like this.
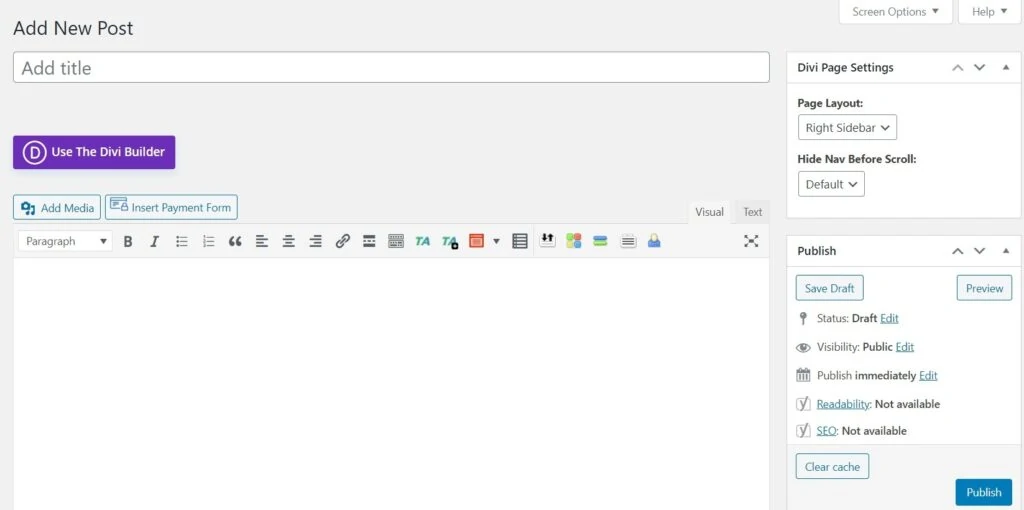
Otherwise, WordPress provides the Gutenberg Editor automatically and it does look different. (In my opinion, it’s not as easy to use.)
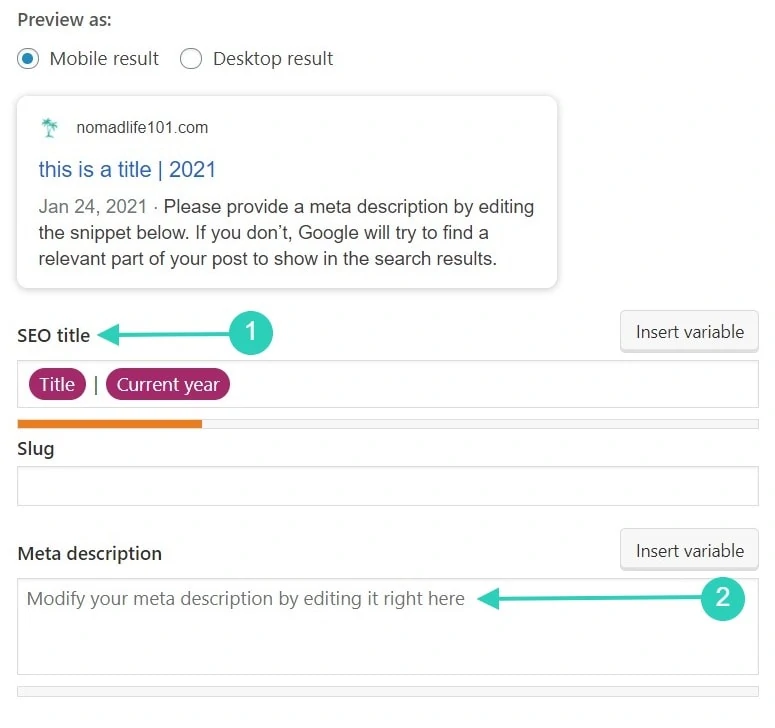
At the top, you can add your title and you can write your content below. If you installed the plugin Yoast, you’ll see options to change your title for Search Engines as well as the description.
 Here are some important functions:
- Title
- Save draft
- Preview
- Publish
- Categories
- Set featured image
Over the years, I developed a process to write great blog posts. So, here it is.
Step #1: Once I pick the blog topic, I do keyword research. I come up with a list of keywords to target for the blog post. Learn how to do keyword research with Keysearch.
Step #2: Go to Google and click on the current results for the main keyword. These are your competitors and your mission will be to write better content than them.
Step #3: Come up with an outline that is better than your competitors.
Step #4: Start writing.
Step #5: Add links and create images to support your content.
Step #6: Optimize your title and description by using the Yoast Plugin. You need to make sure to add your main keyword within the title and description.
Step #7: Choose the relevant category (or create one if you don’t have any).
Step #8: Optimize the URL if needed by making sure the URL is short and includes the main keyword.
Step #9: Take a look at the preview to make sure it looks right in the front end.
Step #10: Click on publish.
It looks like you just published a blog post.
Publish Your Content
In theory, you already published your first blog post in the previous section. Now that your post is live, make sure it still looks good on the front end. You can always update this article in the future.
In fact, I update old blog posts on a regular basis to make sure the information stays up to date.
Promote Your Content
The best way to get traffic quickly as a new blogger is by promoting your blog posts. Since traffic from Google can take time, you could promote your content on social media.
That said, you can create graphics and promote your content on Pinterest, Instagram, Facebook, etc. You can use your personal accounts and the ones you created for your blog.
I’d suggest you learn how to use social media to increase your blog traffic and implement the best practices for each platform to maximize your traffic.
I personally prefer using SEO strategies, but it can take time if you’re not familiar with SEO. Good news: You can jumpstart your blog by learning SEO from the start – join SEO from Scratch to learn how to increase your blog views.
Now before you start writing more content, take a look at some useful resources for bloggers.
Useful Resources for Bloggers
I’ll start by saying that if you need tutorials and more guides like this one about blogging, you can head to our blogging section.
If you prefer watching videos, subscribe to our channel on Youtube and watch our tutorials there.
Now let’s take a look at resources and tools that can help you blog better and more efficiently.
Canva
Canva is a free web app that allows you to create graphics and designs. Although, if you want to be serious about blogging, you should consider signing up for the pro plan. The pro plan lets you use stock photos, save your brand colors and you’ll have access to more elements without having to pay for them.
Tailwind
Tailwind is a scheduler that allows you to schedule pins on Pinterest or images on Instagram. Although, now you can schedule directly on Pinterest. I use it so I can promote my pins within their tribes and schedule all my pins there.
Grammarly
Grammarly is a chrome extension that can help you fix your typos and silly mistakes. I personally use the free version, but you could go for a more sophisticated plan.
Colorzilla
This chrome extension allows you to find the color code anywhere on the web. It’s a great way to remember your brand colors or to find the color codes for the colors you wish to use.
Nimbus Screenshot
This chrome extension allows you to take screenshots from a specific area on a page, and you can add boxes or arrows directly on your screenshot.
Moz
Moz is a tool that lets you check your domain authority for free. You can have up to 10 credits for free each month. Knowing your domain authority helps you predict your chances of ranking for a keyword – and that’s useful for SEO.
Headline Studio
This chrome extension analyses your headlines and helps you come up with better blog post titles.
Keysearch
Keysearch is a tool that I use to do my keyword research. While you can use their free trial to get started if you wish to be serious about blogging you should consider investing money in this tool. It’s better to create content that you can rank for on search engines.
Online Image Compressor
This free web app allows you to compress your images so you can speed up your website. You should compress your images before uploading them into your WordPress dashboard.
Best Blogging Practices
Finally, here are some tips about the best blogging practices. I’m going to add a few things that I wish I had known when I first started blogging.
Featured Image
You should always add a featured image when publishing a new blog post. This image is basically the cover for your blog post.
It’s recommended to have a featured image that satisfies Google requirements – which is 1200px x 628px.
Although depending on your theme, they may recommend different sizes, so I’d suggest you look into it.
Image File Name & Alt Text
When uploading an image, make sure to optimize the file name. For example, your image name should not be IMG2587, but Woman cooking chicken. This way, search engines can read your images. This also applies to the Alt Text – which basically acts as an image description. Make sure to add the keywords related to your content there.
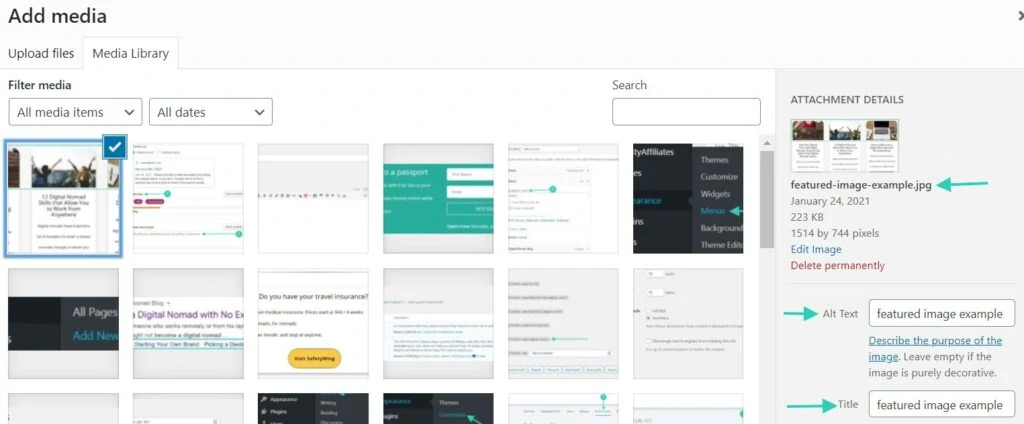
Image Size
As I mentioned a couple of times in this guide, you should compress your images before uploading them to your blog post. By compressing the image first, and getting it even more compressed with the Plugin Shortpixel, your website speed will be faster.
You should also take a look at the recommended size for images by your theme. If the theme shows maximum size of 1200px x 500px, you should use this size for your images too – a larger image would be heavier and not needed.
Internal Links
When possible, you should always link between your articles. This is called Internal Link. Search engines like to see that you can easily link between your articles – because it means you are an authority about a topic.
For example, if you have a lifestyle blog and you blog about makeup, and fitness, and swimsuits, it gets harder to link to your articles – which means your blog topic (niche) is not defined and it can get confusing for Google to understand what your website is about.
Internal links encourage your readers to stay longer on your website. When a reader clicks on a link on your website, they show Google that they love what they see and that your website is helpful.
External Links
It’s recommended to link to high authority websites. An external link is basically a link that brings your reader to another website. Authority websites are sites that have high domain authority.
For example, news websites, or a website that exists for a long time are more trustworthy. When you link to a website like this, the search engine trusts you more as a result.
Final Thoughts
And there you go, you have it – your complete guide to blogging – step by step. I do hope you are feeling more equipped to get started with your blog now. I invite you to bookmark this page so you can come back to it every time you need it.
Blogging can seem like a real challenge that includes several steps and lots of learning, but it’s fun too. Every day will be different.
If you enjoy learning new things and you’re up for a challenge – you’re going to love blogging.