If you finally decided to choose Divi by Elegant Themes to design your blog, you may be wondering how to install Divi Theme in WordPress.
The good news is that it’s quite simple, but if you’re still new at blogging and with WordPress, I made you a guide that you can follow so you can upload Divi to WordPress easily.
Keep reading to get the step by step overview and to get more details on how to install Divi in WordPress.
How to Install Divi Step by Step Overview
You can either read the guide to know every step or you can watch this quick Divi tutorial.
Step #1
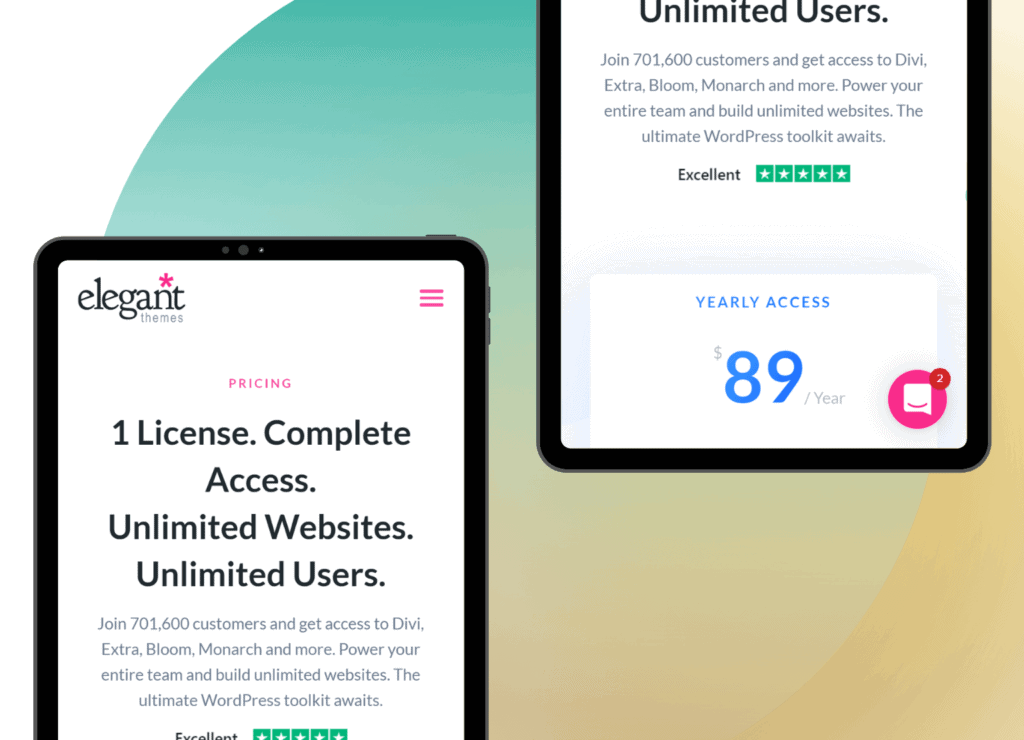
The first step is to sign up. There are two ways to get Divi. The first way is to pay for yearly access which costs $89 per year. The second option is to get lifetime access which you pay once. It costs $249. After a few years, paying for the yearly access, I decided to opt for lifetime access. If you’re happy with Divi within the first year, you may want to switch to lifetime access quicker than I did.
Step #2
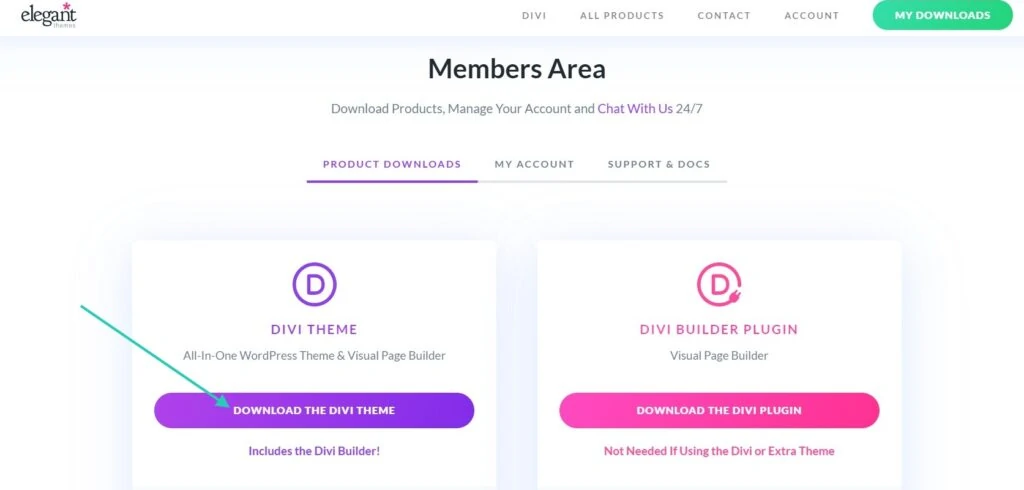
Once you are logged in to your member account on Elegant Themes, you’ll find a Download tab. You can simply click on the Download button under Divi. By clicking this button, you’ll see a zipped theme folder download.
Step #3
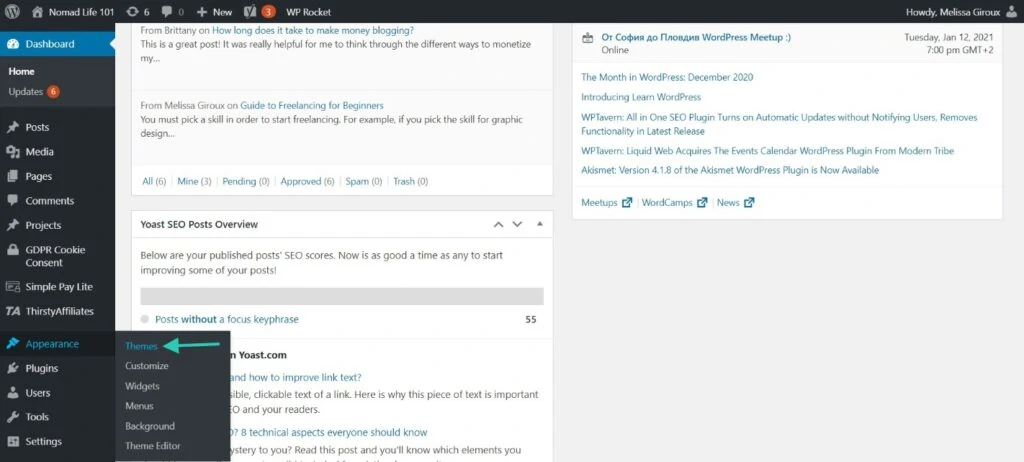
Once the download is completed, you can log in to your WordPress dashboard. Then, you can click on Appearances › Themes.
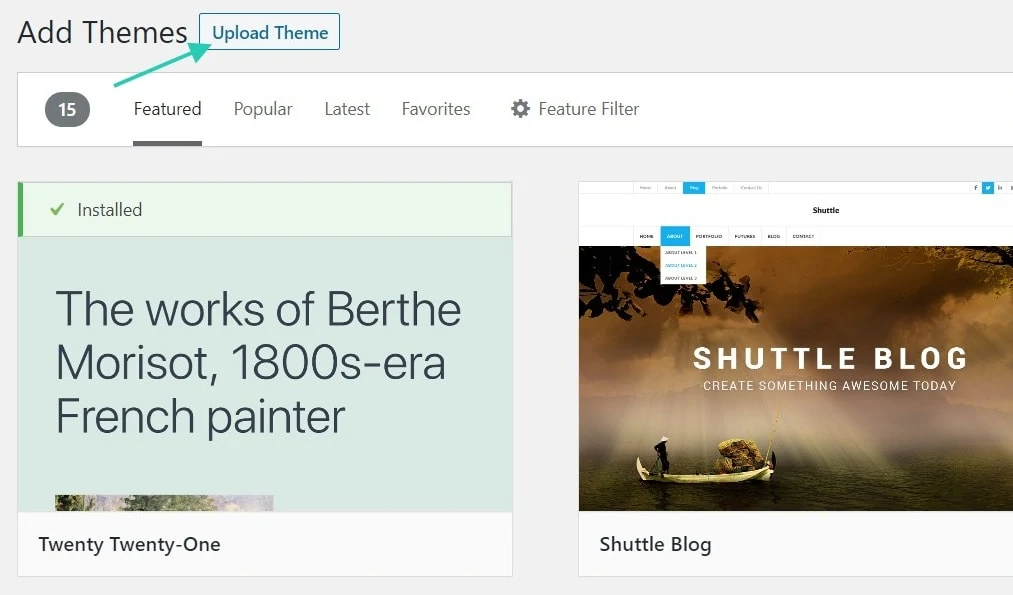
Step #4
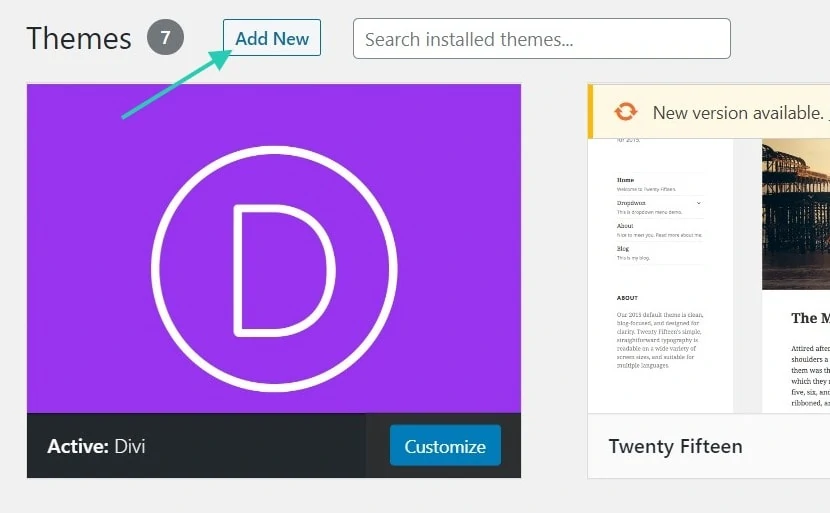
At the top of your screen, click on the button that says Add New.
Step #5
This click will bring you to the next screen. A the top of the page, you’ll see a button called Upload Theme. Following this screen, you’ll get an option so you can upload your Divi Theme. Simply click on Choose File to find your Zipped theme folder which was downloaded at step #2.
Step #6
Once the file is chosen, click on the button Install Now.
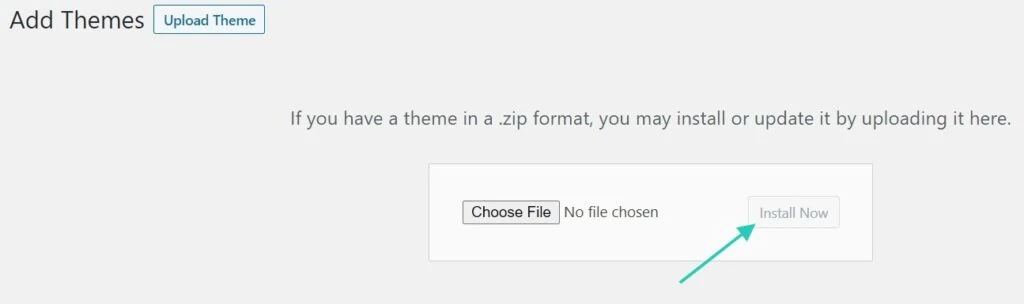
Step #7
The page should be reloaded, and then you’ll need to click on a link that says Activate Theme. This click will complete the installation of Divi.
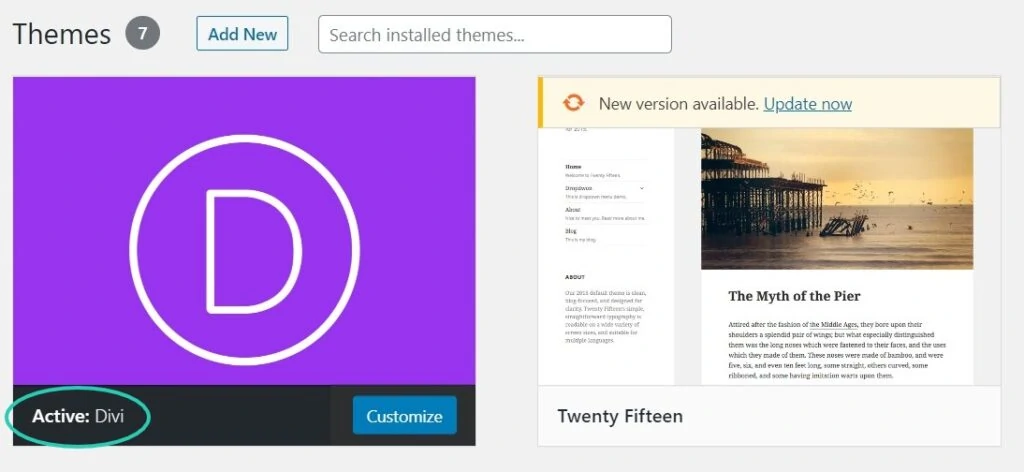
Now that you have installed Divi Theme in WordPress, you may wonder how to set it up. Keep reading to see the next steps.
How to Set Up Divi
Now that Divi is installed, there are still many things to set up. The first thing to do is to head to Divi › Theme Options. This way, you can set up some basics for your website.
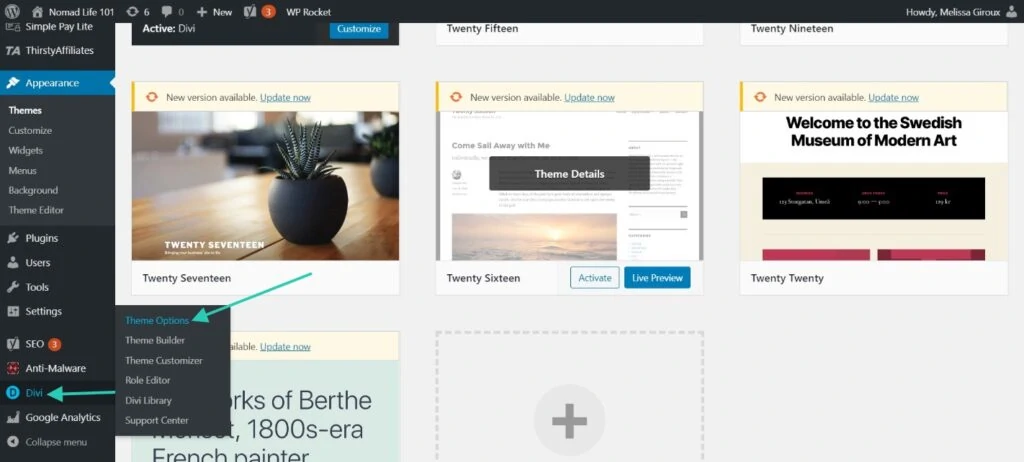
The first thing you should do is to click on the Updates tab at the top so you can enter your Divi account information so you can get the updates when Divi releases new features.
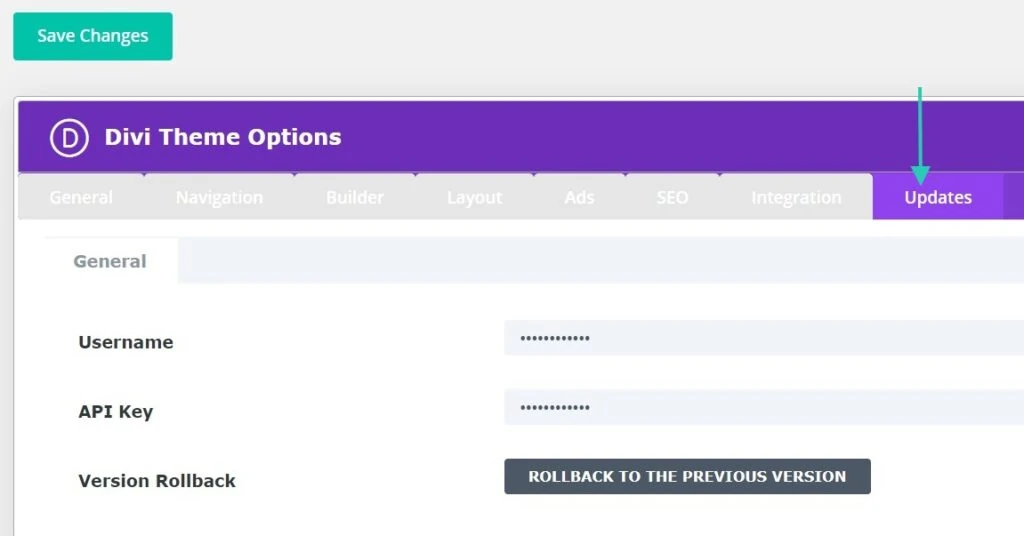
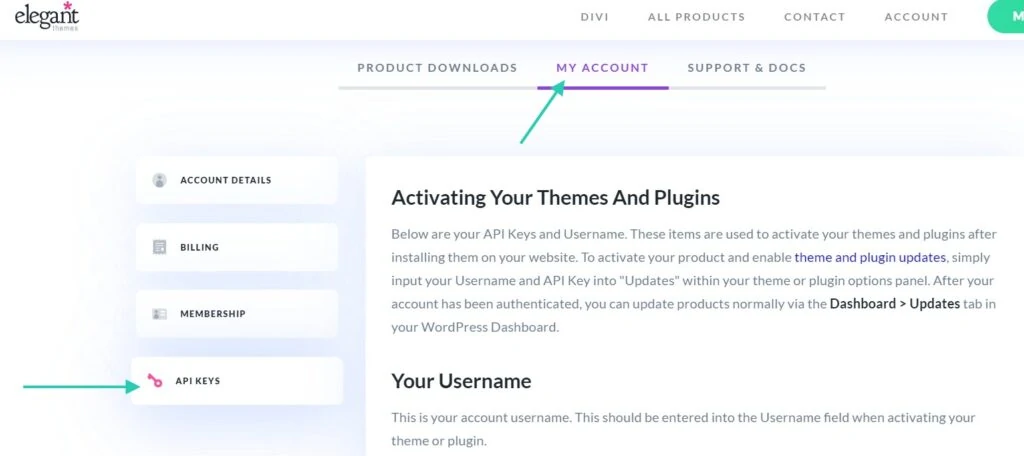
You’ll find your Username and API key on your Elegant Theme account by clicking on My Account and API Keys. You’ll be able to copy your information and paste them to WordPress.
Once that’s done, you can head back to the first tab General.
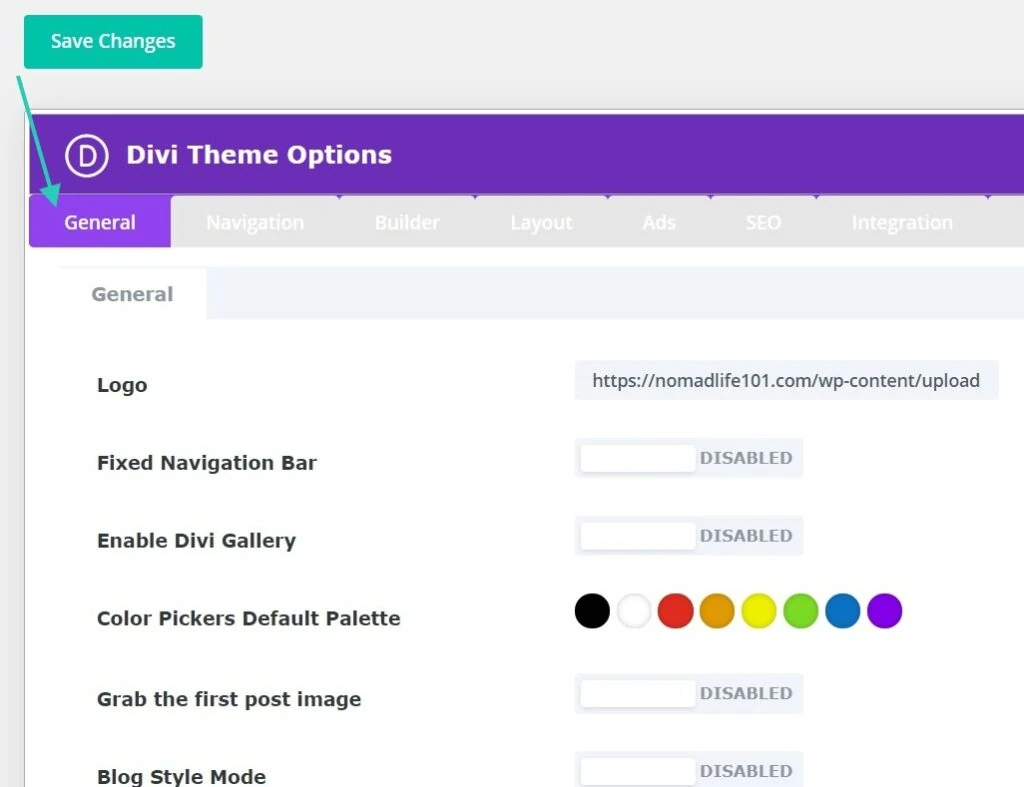
On this tab, you’ll find many options.
- You can upload your logo
- Pick the social media icons to show
- Pick a layout
- Choose technical bits
It may be confusing at first, so here are my current settings. You may want to check my website and see if these settings suit your needs.
- Fixed Navigation Bar: Disabled
- Enable Divi Gallery: Disabled
- Color Pickers Default Palette: None selected
- Grab the first post image: Disabled
- Blog Style Mode: Disabled
- Sidebar Layout: Right Sidebar
- Shop page & Category Page Layout for WooCommerce: Right Sidebar
- Google API Key: Field is empty
- Enqueue Google Mpas Script: Enabled
- Use Google Fonts: Enabled
- Show Facebook Icon: Disabled
- Show Twitter Icon: Disabled
- Show Google+ Icon: Disabled
- Show Instagram Icon: Disabled
- Show RSS Icon: Disabled
- Facebook Profile URL: Add a link to Facebook page
- Twitter Profile URL: Add a link to Twitter profile
- Google+ Profile URL: # (Field is empty)
- Instagram Profile URL: Add a link to Instagram account
- RSS Icon URL: Field is empty
- Number of Products displayed on WooCommerce archive pages: 9
- Number of Posts displayed on Archive pages: 10
- Number of Posts displayed on Search Pages: 10
- Number of Posts displayed on Tag pages: 10
- Date Format: M j, Y
- Use Excerpts when defined: Enabled
- Responsive Shortcodes: Enabled
- Google Fonts Subsets: Disabled
- Back To Top Button: Disabled
- Smooth Scrolling: Disabled
- Disable Translations: Disabled
- Enable Responsive Images: Enabled
- Minify And Combine Javascript Files: Enabled
- Minify And Combine CSS Files: Enabled
- Custom CSS: Enter any custom CSS you’d like here.
Once you pick the options you need, you can click on the button Save Changes.
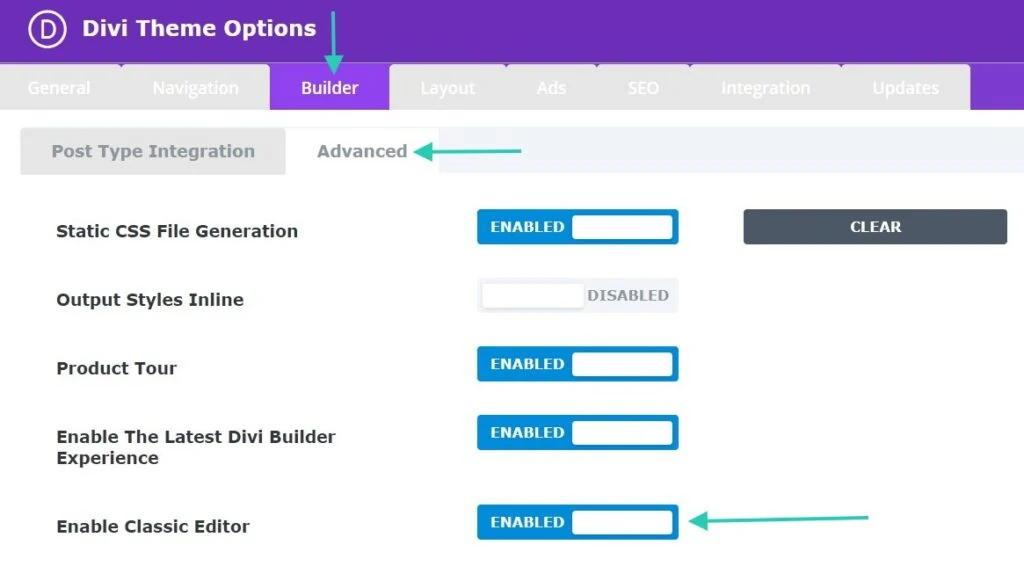
If you’d like to use the Classic Editor instead of Gutenberg, you can go to Builder › Advanced and enable the classic editor.
You can also play around with the other tabs if you’d like, but the General tab and Updates are the most important ones, in my opinion.
Then, once that’s done, you can start customizing your website. You can start by clicking on View Website and then clicking on Theme Customizer.
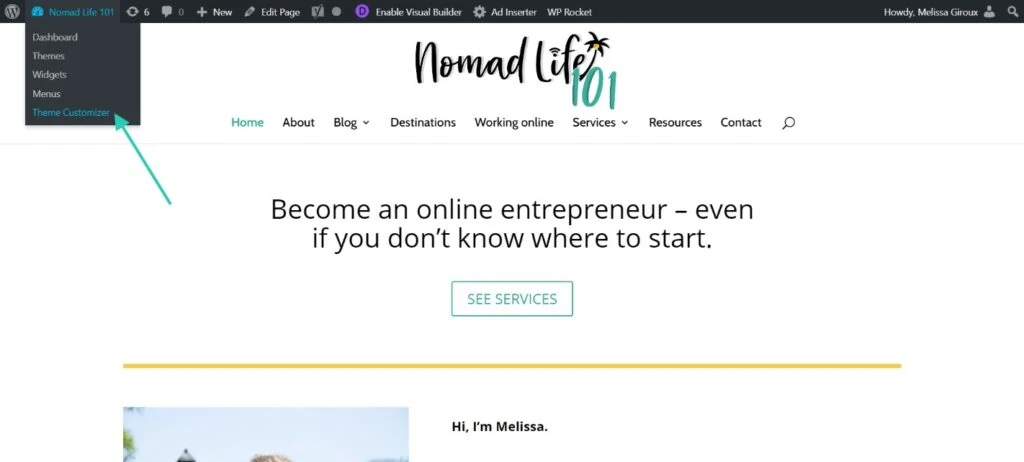
Or you can click on Divi › Theme Customizer to reach the same screen.
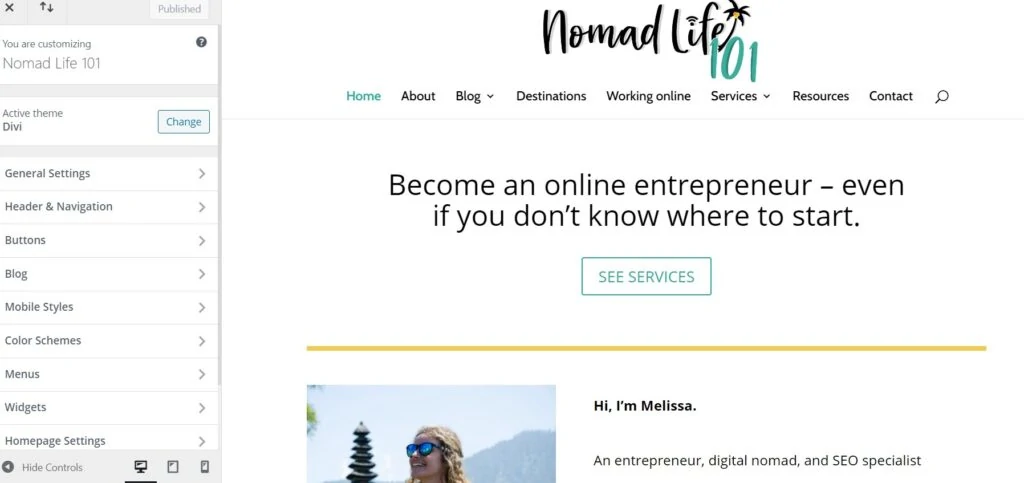
You’ll see this sidebar which allows you to customize things. The best way to understand all these features is to play around them and see how it affects the look of your site.
How to Build with Divi Theme Builder
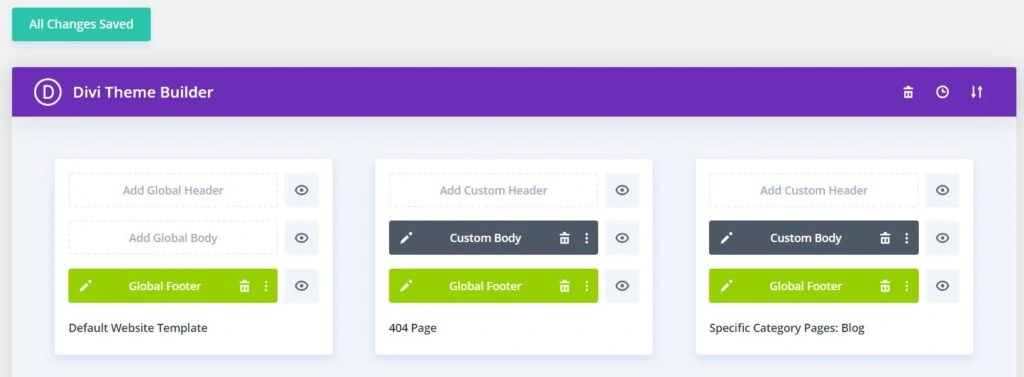
In 2020, Divi released a new feature that allows you to create a Global Header, Global Body, and Global Footer for your website. It makes it easier to customise your site design than by using the Theme Customizer.
To use this feature, you can click on Divi › Theme Builder. You can click on one of the options to add a Global Header, Footer, etc.
Here’s an example of a Global Header created for another website:
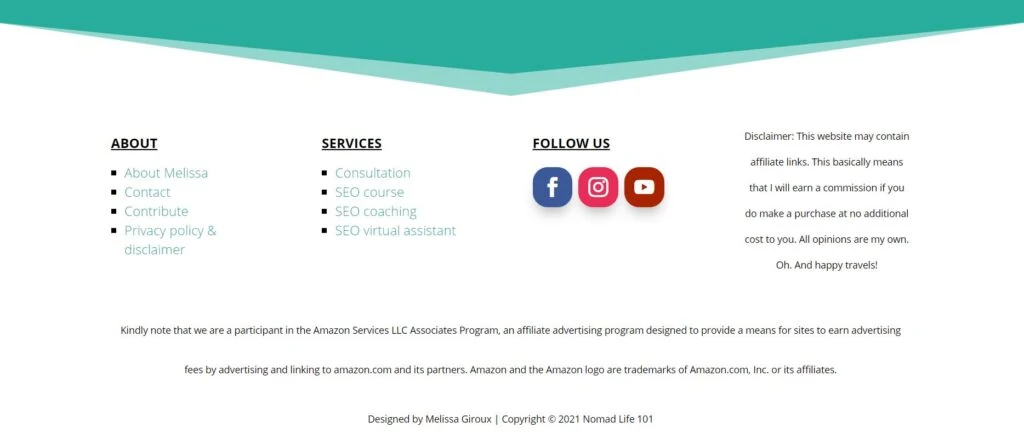
Here’s an example of a Global Footer created for Nomad Life 101:
I also use it to create customized Category Pages.
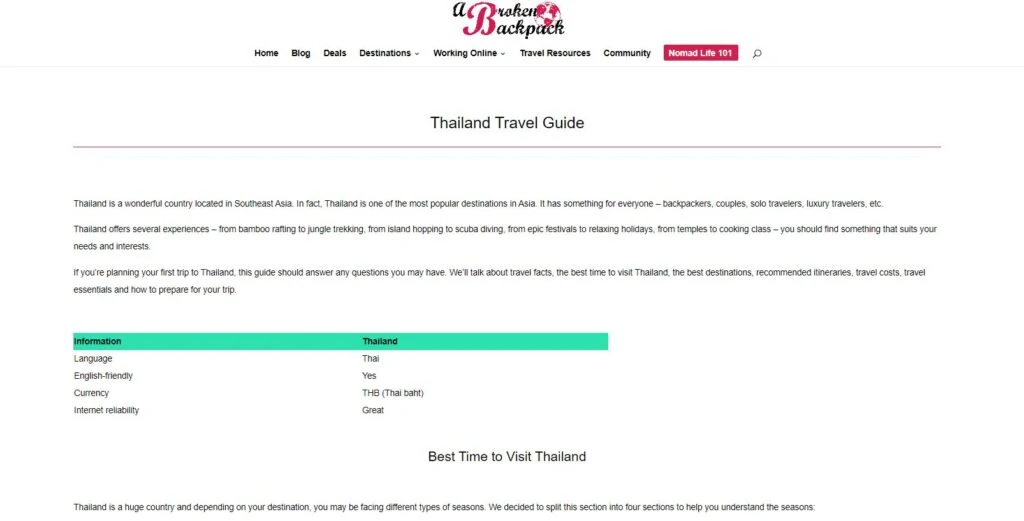
Here’s an example of a Specific Category page created for A Broken Backpack:
With the Divi Theme Builder, you can also create a 404 page. You can easily replicate a template, and it’s easy to use.
WordPress Classic Editor VS Divi Builder
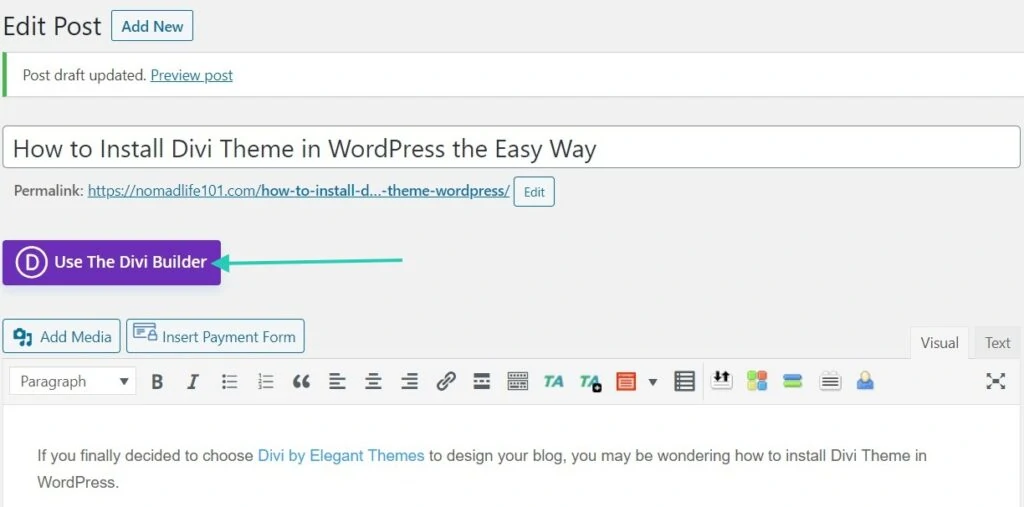
With Divi, there are several ways to build a page or a post. The first option is via the Classic Editor (or Gutenberg if you use it). The other way is by clicking the button Use The Divi Builder.
I use the Divi Builder when I create pages, and I use the Classic Editor when I create blog posts.
Why’s that?
The Divi Builder allows you to customize pages. This is ideal for your homepage, about page, contact page, or category pages. Although, when it comes to reading content, it’s easier to keep it simple and use the Classic Editor.
When you click on the Divi Builder, a new page will load with three options:
- Build from scratch
- Choose a premade layout (Divi offers hundreds of free templates)
- Clone existing page
You can pick an option. Once that’s done, the page will reload. You can decide to work on the page there in the back end, or you can click on the button Build On The Front End. By clicking this button, you’ll be able to use the Drag and Drop feature and see how it looks like.
And there you go, you’re designing your website with Divi!
Final Thoughts on Divi
I’ve been using Divi since 2015, and while it was a bit hard at first, I really do love it, and I have no intention of switching to a different theme. I’ve been using Divi for several websites now, and I’m happy with the results.