If you decide to start a WordPress Blog on Bluehost, you should know that the process is easy and painless.
In this post, I’ll give you all the steps required to set up your WordPress blog on Bluehost.
That said, if you’re still here – let me help you start your WordPress blog on Bluehost.
Overview
The whole process takes about 10 minutes or so. Although, if you don’t have your blog name yet, it may take longer while you brainstorm ideas.
Here’s a quick overview of the process:
- Purchase a hosting plan.
- Pick a domain name.
- Install WordPress.
Now if you’re already lost here. Let me simplify these steps for you.
A hosting plan is required to build a self-hosted blog. Every website on the web is hosted on a server.
A domain name is an address for your website. For example, my domain name is nomadlife101.com.
Once you purchased a hosting plan and your domain on Bluehost, you’ll be able to install WordPress with just one click. WordPress is a software that allows you to manage your blog. It’s a content management system.
Step 1: Purchase a Hosting Plan on Bluehost
So, head to Bluehost to purchase your hosting plan. You can opt for the basic plan which allows you to get started with one website. At the top, you can select different plans from 12 months to 36 months.
You’ll see that the prices can differ depending on the plan chosen. The best option is with the 36-month plan. You’ll be able to start a blog for just $3.95 per month.
Select a plan that suits your needs.

Step 2: Pick a Domain Name
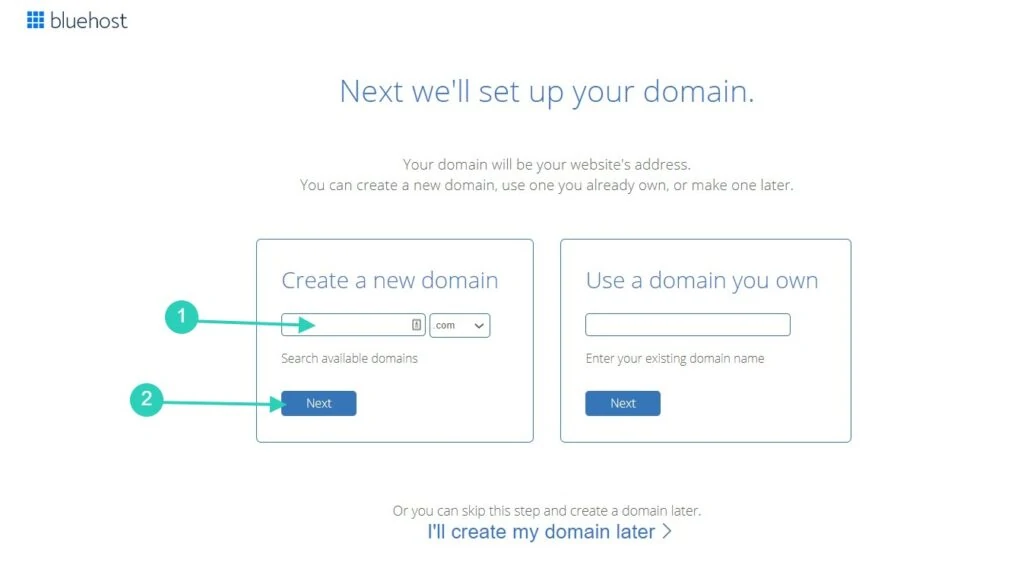
When the next page load, you’ll have to pick your domain name. Need help to find a good name for your blog? Read our tips to find a catchy name.
Write down the domain chosen and click on next to see if the domain is available. You may need to try a few before you find one that is available and that makes you happy. If you can’t find anything, you can also click on “I’ll create my domain later” at the bottom of the form.
The page will reload and you’ll have to enter your information. At the bottom of the page, you’ll find a section that includes package extras.
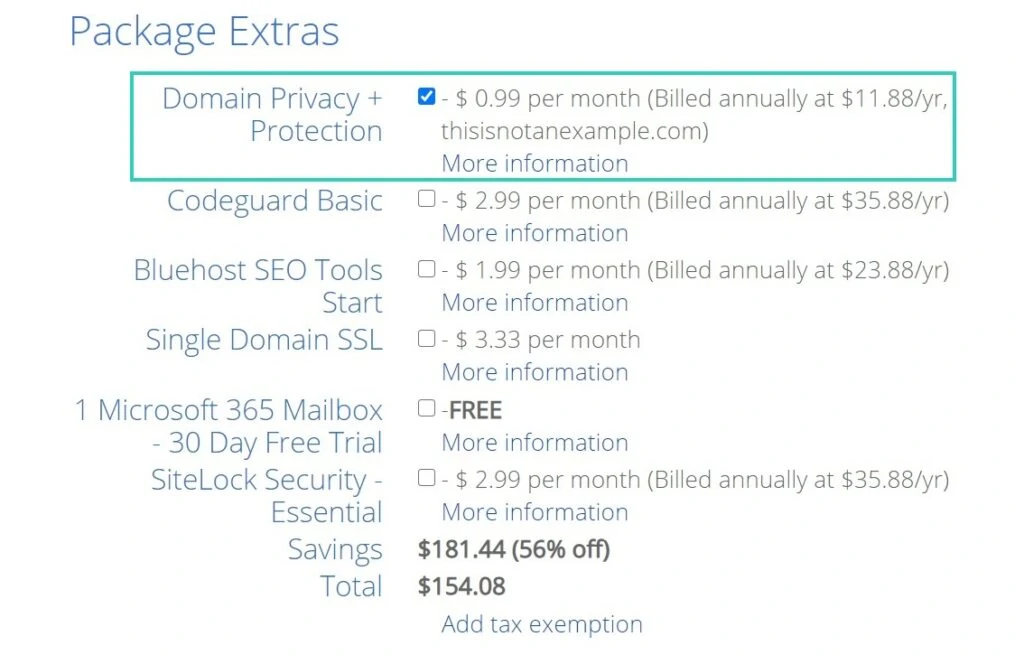
I personally only pay for the Domain Privacy + Protection. It basically means that your private information won’t be shared in Bluehost’s public records. Obviously, you don’t have to pick this option, but if you don’t, you can expect to get hundreds of emails from strangers since your information will be public.
Finally, at the bottom of the page, you can enter your payment details and accept the terms and conditions. Once that’s done, you can click the button “Submit”.
Step 3: Install WordPress
Once you purchased your domain and hosting plan, you’ll land on your Bluehost dashboard and you’ll see an option to install WordPress.
During WordPress installation, you’ll see different options for themes and plugins. I’d suggest skipping these steps. There are better premium themes you can purchase that offer more flexibility with designs. I personally use the Divi theme.
Then, the installation will be over and you can start playing around with your website. But, I’d suggest setting up a couple of things in your Bluehost dashboard first.
How to Set Up Your Website in the Bluehost Dashboard
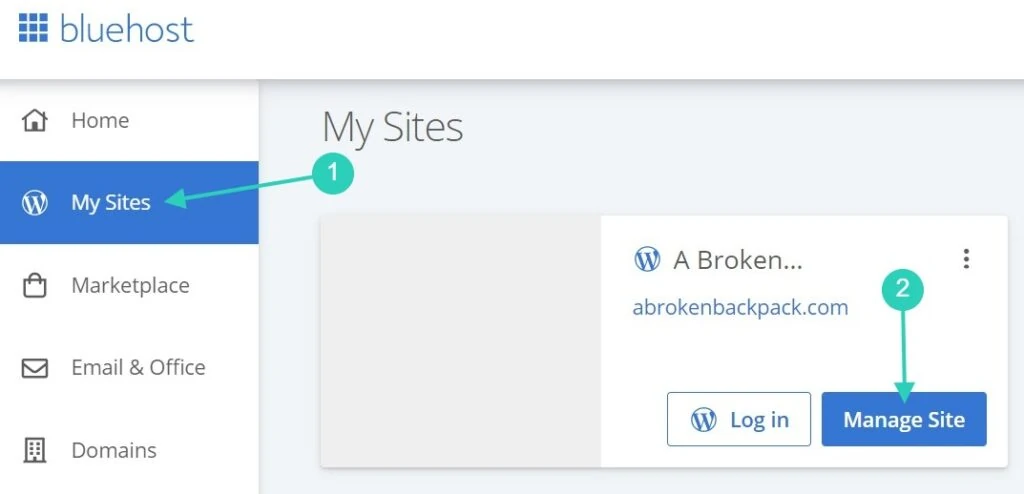
Go back to your Bluehost dashboard, and click on My Sites > Manage Site.

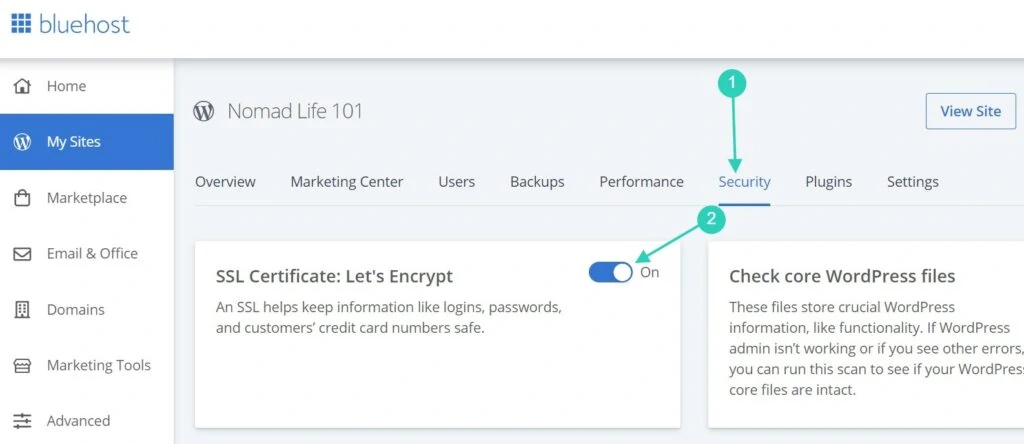
Then, head to the Security tab.
Make sure to enable the SSL certificate to make your website more secure. It may take a few hours before you can access your website again while the Bluehost team sets it up. It’s important to do this step from the beginning since you won’t get the SSL certificate automatically. You need to enable it manually.
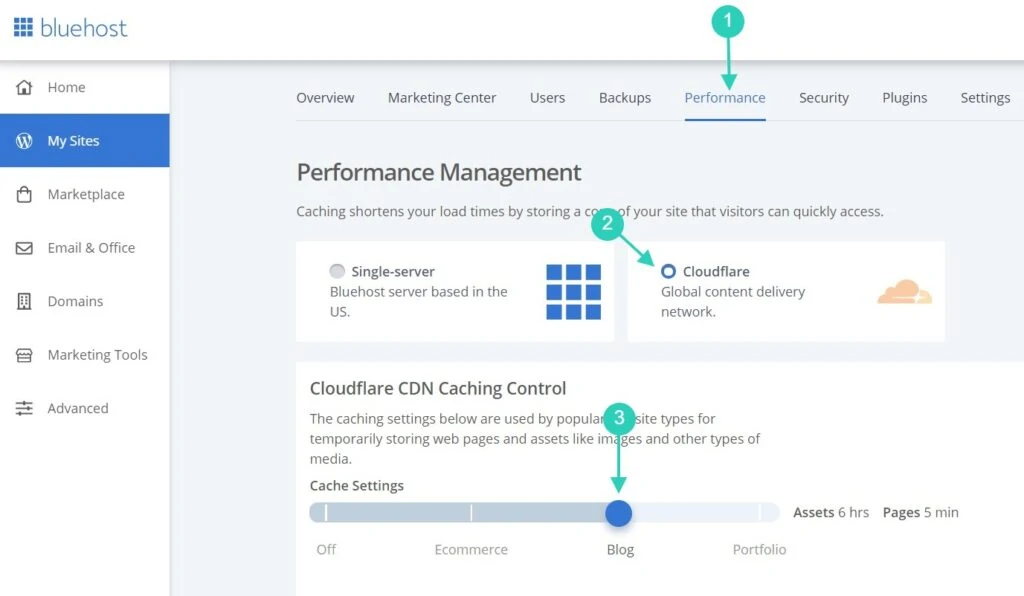
The next thing to set up is in the Performance tab. In the performance management section, select Cloudflare and make sure it’s set for Blog. This means your website will be using a global content delivery network (Cloudflare) and your website is going to load faster.
By enabling these two things, you’re setting up your blog for success. You can expect a faster and more secure website.
Now, you can head back to your WordPress dashboard and start building your blog.
How to Access WordPress
Go to your Bluehost dashboard, and click on My Sites > Manage Site. Then, you can click on Log in WordPress. You’ll be redirected to your WordPress dashboard.

You can also access your WordPress dashboard by typing your URL and by adding /wp-admin at the end. This works like this: yourdomain.com/wp-admin.
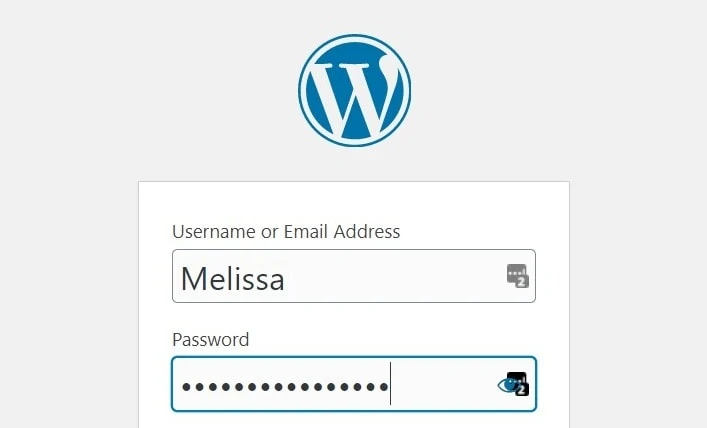
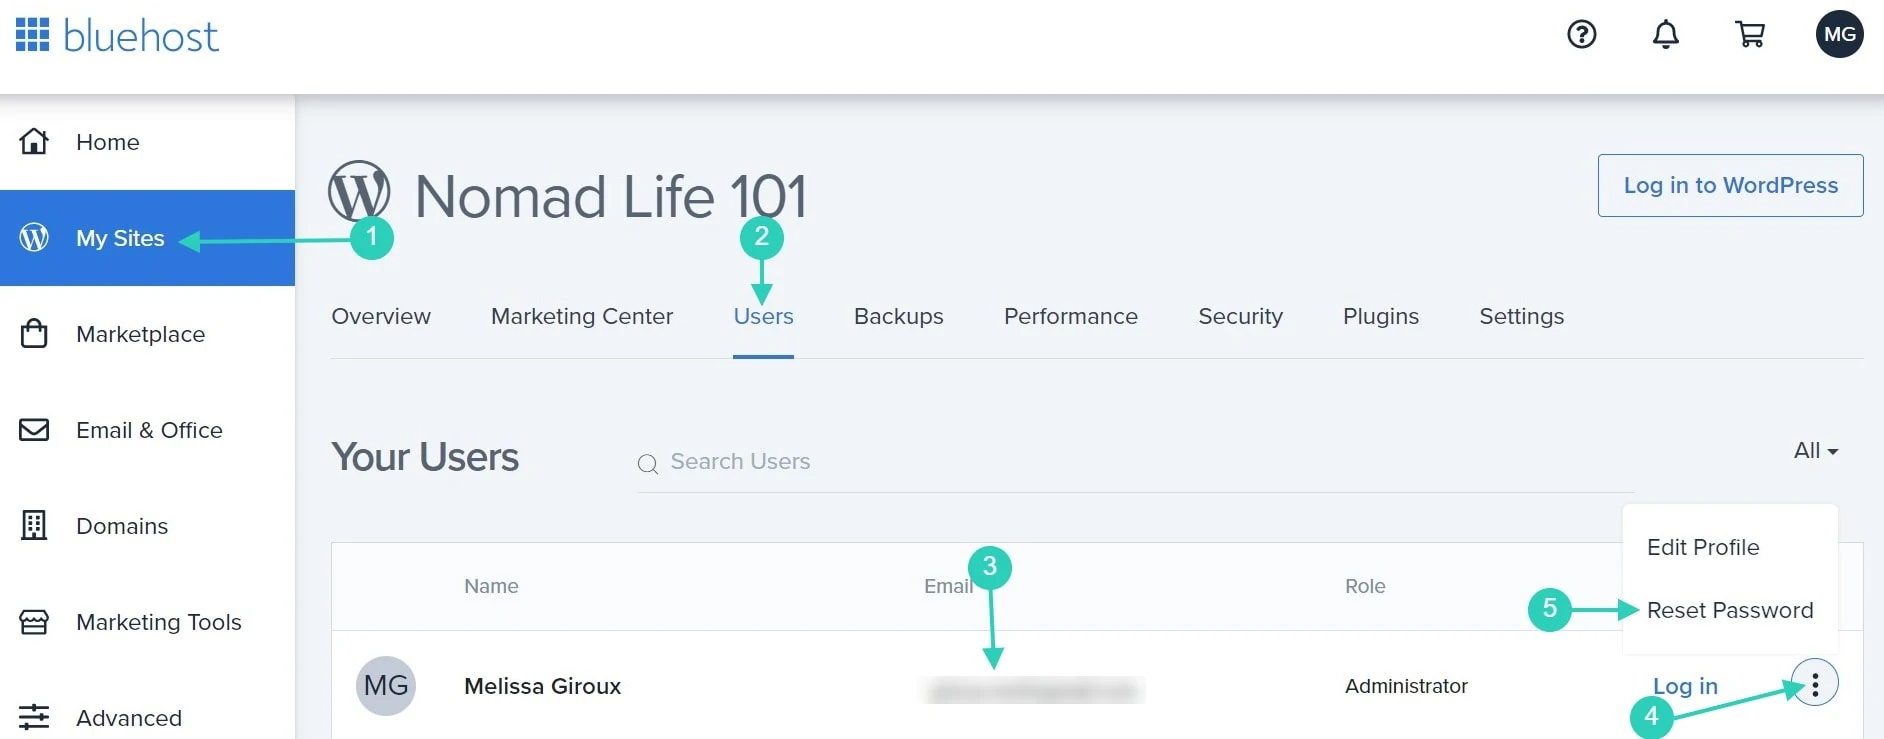
The page will reload and you’ll find a login page. Bluehost sent you your account information in an email. If you can’t find it, go to My Sites > Manage Site > Users. You’ll find your username and you can reset your password if needed.
The next step is to install a theme. If you want to use Divi, read our guide on how to set up Divi in WordPress.
Final Thoughts
Once your blog is officially started and WordPress is installed, you’ll have lots of other things to set up. The first step is to install a theme and then, you’ll need to add WordPress extensions.
The initial setup is quite easy but important. It may get overwhelming which is why I created detailed guides to help you set up everything. Head to the blogging section to read our tips.