Many bloggers rely on Pinterest to generate traffic to their blogs. Pinterest has been one of my top sources of traffic for years.
This is why I think that every blogger should be on Pinterest. Pinterest is a visual search engine. Ideal for food, lifestyle, travel, home, craft, DIY bloggers – thousands of Pinterest users are scrolling on Pinterest to find new ideas.
In this post, we’ll discuss why you should be using Pinterest for blogging and how to use it to generate traffic to your blog. I’ll walk you through the steps so you can create your account, and start pinning.
Why Use Pinterest For Blogging?
Pinterest is a visual discovery engine for finding ideas and inspiration. While I usually only talk about SEO (Search Engine Optimization), Pinterest could generate traffic to your website even if you’re just starting out.
That’s important because when using SEO, it can take months before you start seeing traffic. That said, combining both SEO and Pinterest will help you get more blog traffic.
There are several reasons to use Pinterest. Let’s take a look at the latest Pinterest numbers:
- 459 million people use Pinterest every month
- 60% of users are women
- 97% of Pinterest searches are unbranded which means users are looking for inspiration and new ideas
If you’re not familiar with Pinterest, let’s discuss how it works.
How To Use Pinterest For Beginners
When you create a Pinterest account, you select your interests. Pinterest will create a home feed for you in which you’ll find Pins, people, and businesses you could love based on your Interest and recent activity.
If you follow people and boards, then you’ll see their pins on your feed too.
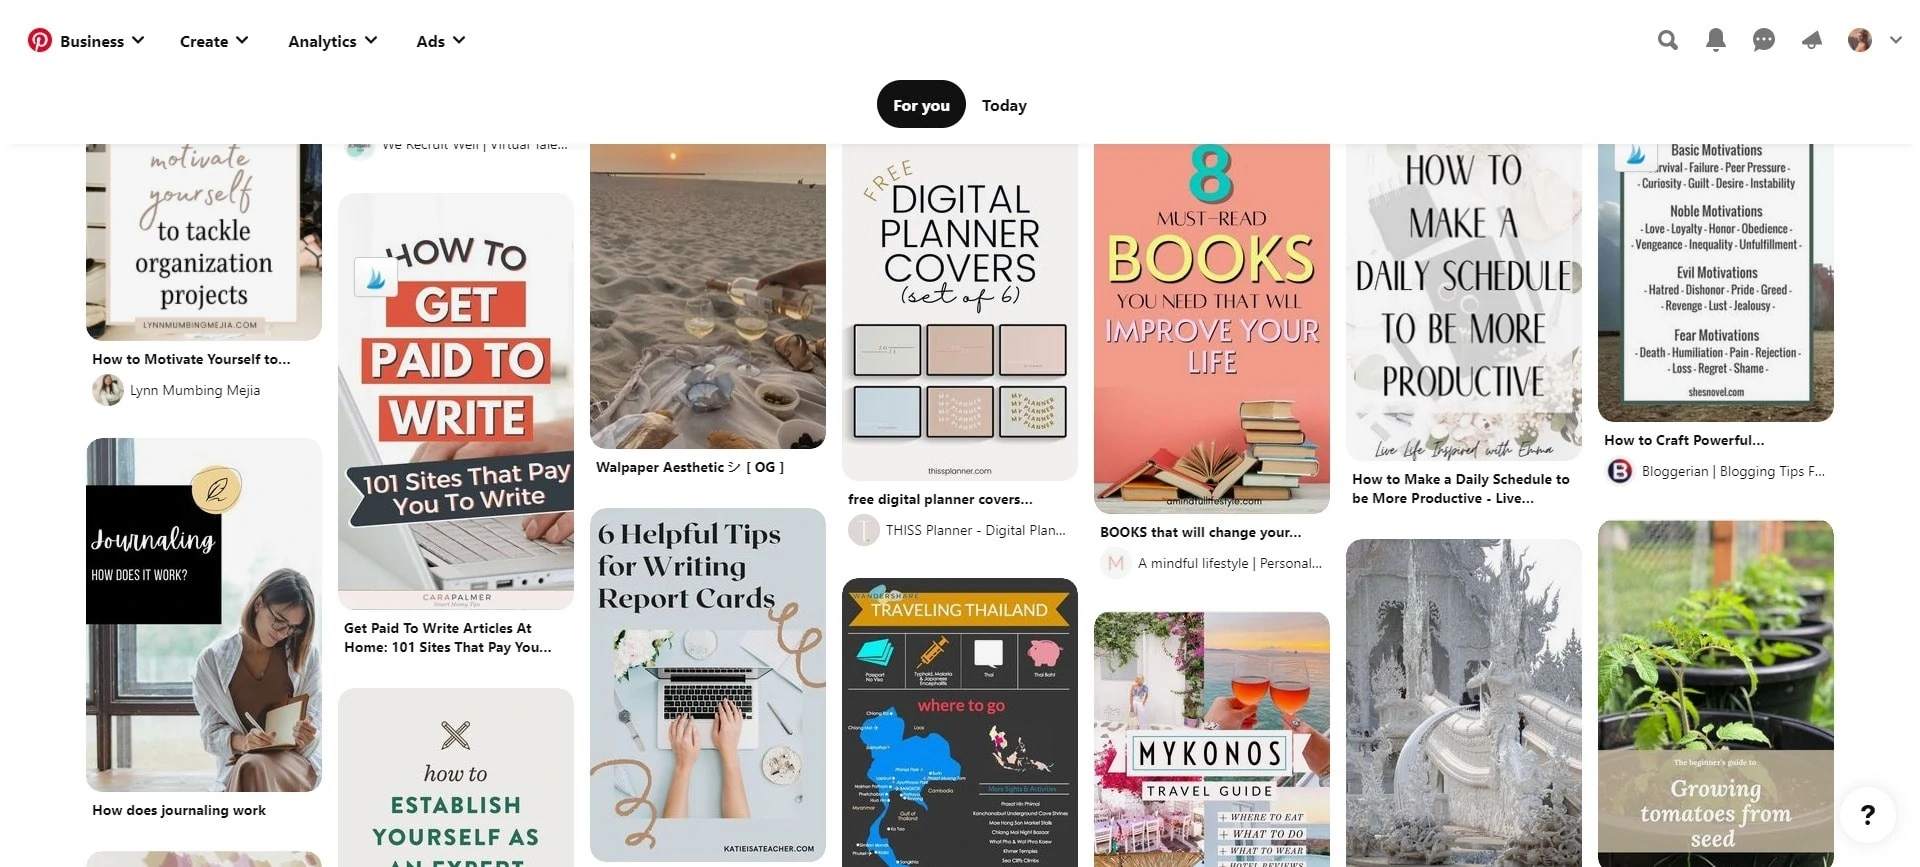
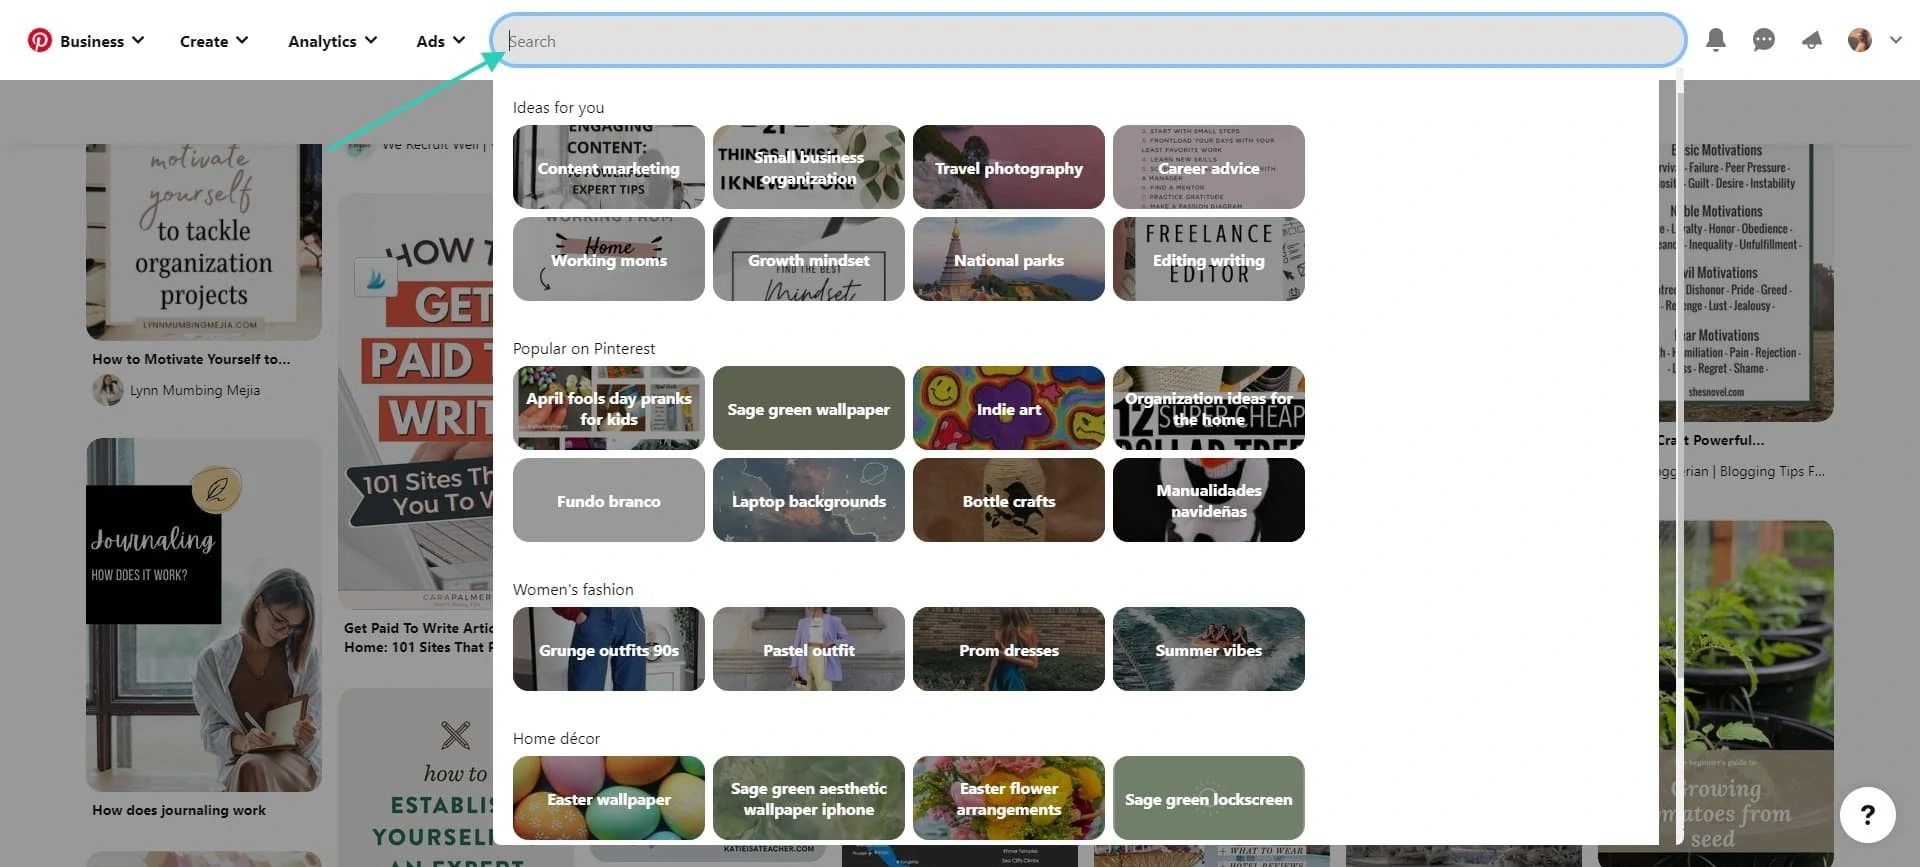
At the top of the page, you’ll find a search bar. You can search for pins by typing keywords. As a result, you’ll find pins related to the topic you typed.
Pins act like bookmarks that people use to save ideas they love. They can be images, videos, or products.
When you click through the pin, you can visit the website to get more details. For example, if the pin showcases a recipe, you’ll find the full recipe directly on the website linked to the pin.
Alternatively, you can save the pin for later on one of your boards. Boards are acting like categories. That said, you could create a board for recipes, crafting, DIY, and so on.
As a blogger, you can create pins and link them to your content. And that’s how you’ll get traffic to your blog.
Let’s see how to use Pinterest for your blog.
How To Use Pinterest For Blogging Step-by-Step
Getting started on Pinterest is easy. I’ll walk you through the step from start to finish so you can understand how to create your Pinterest account, link it to your blog, and finally start pinning.
Create A Pinterest Business Account
In order to use Pinterest, you need an account. As a blogger, you’ll need to create a Pinterest Business Account.
If you already had a personal account for your blog, head here to learn how to convert your personal account into a business account.
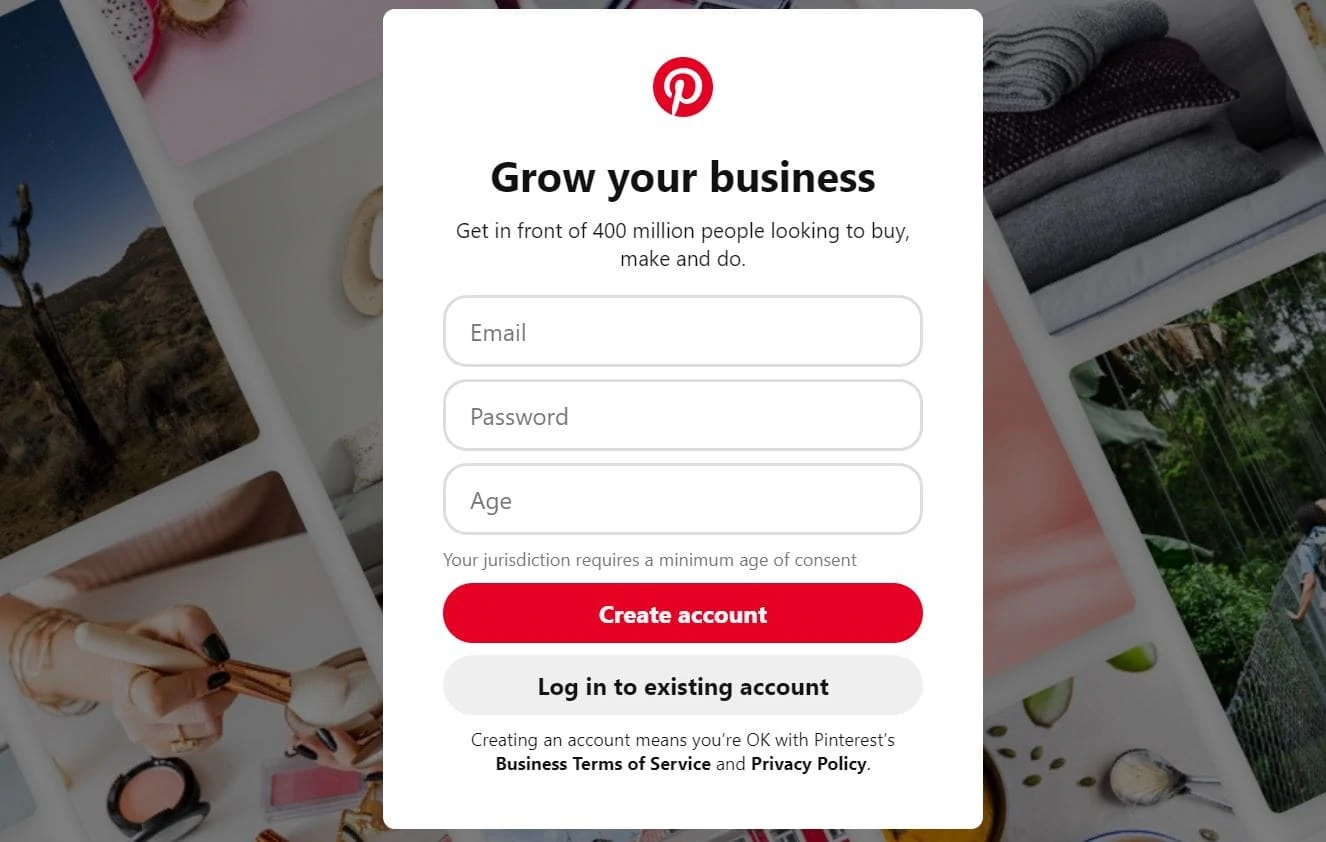
- To create a Pinterest business account, click here.
- Enter your email, a password, and your age.
- Click on Create Account
- Enter your information to complete your business profile
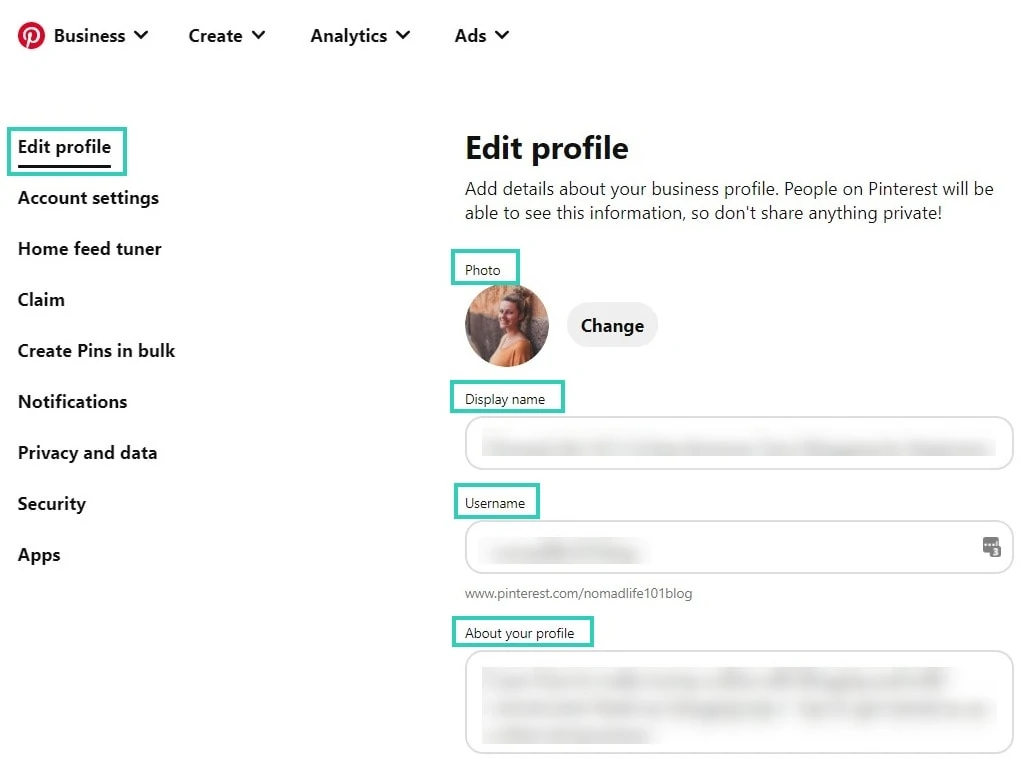
You can always go back at any time to change your display name, photo, and profile description.
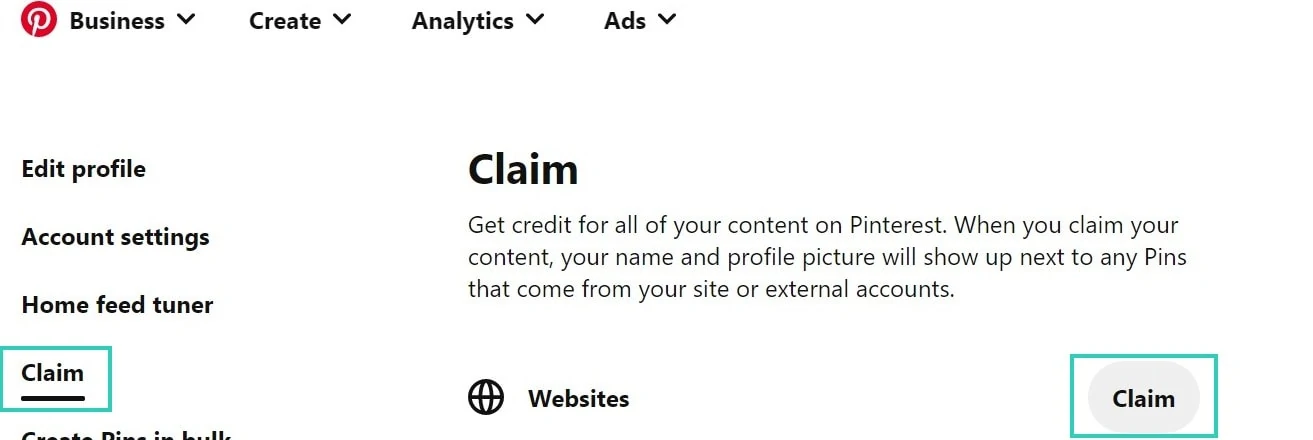
Claim Your Website
To claim your website, go to your settings, and click on Claim. Click on Claim next to websites. You’ll have two options there.
You can either add an HTML tag to your website or upload an HTML file to your website. You can get all the instructions here.

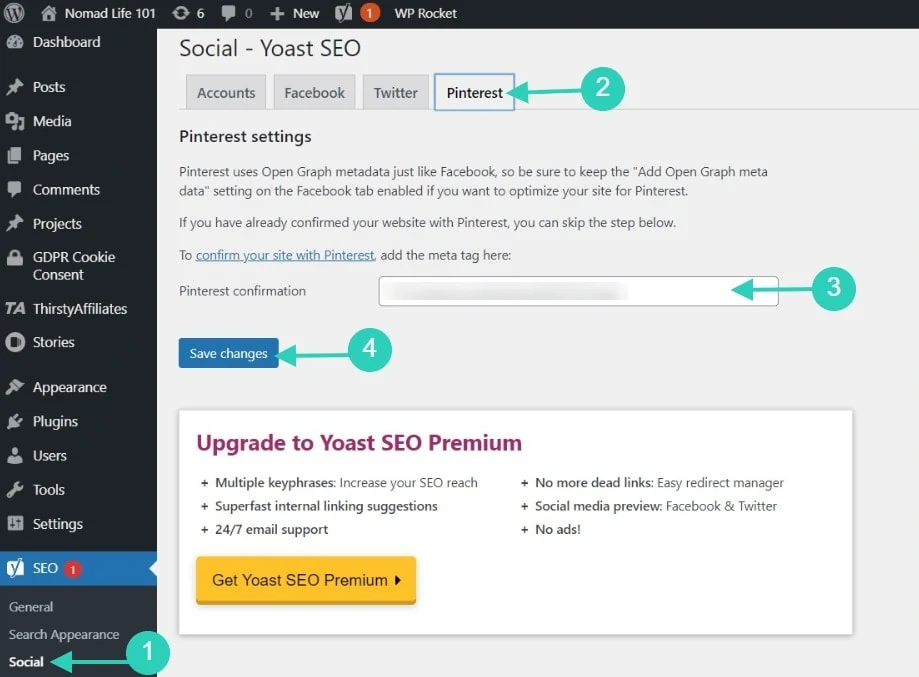
If you use the Yoast plugin, you simply need to go to your Social Settings and click on Pinterest. Simply copy the code into the Pinterest confirmation box. Click on Save changes.
Go back to your Pinterest account, and click Next and Submit. You’ll get an email when your website is claimed.
Set Up Your Profile
If you haven’t completed your profile yet, go back to your profile and finish it up. Your profile is a great place to add relevant keywords to your niche.
Remember when I said that Pinterest is a visual search engine? Search engines understand content and profiles with keywords. That said, adding keywords within your profile description and name is a great idea.
For example, if your blog is a crafting blog, your display name could be: YourBlogName | Crafting Blog | Crafting Tips.
Look at other Pinterest accounts in your niche, check their display names and descriptions, and do better.
Create Boards
The next step is to create boards. Think of boards like categories. The idea is to regroup pins into different categories so it’s easy to understand what a pin is about.
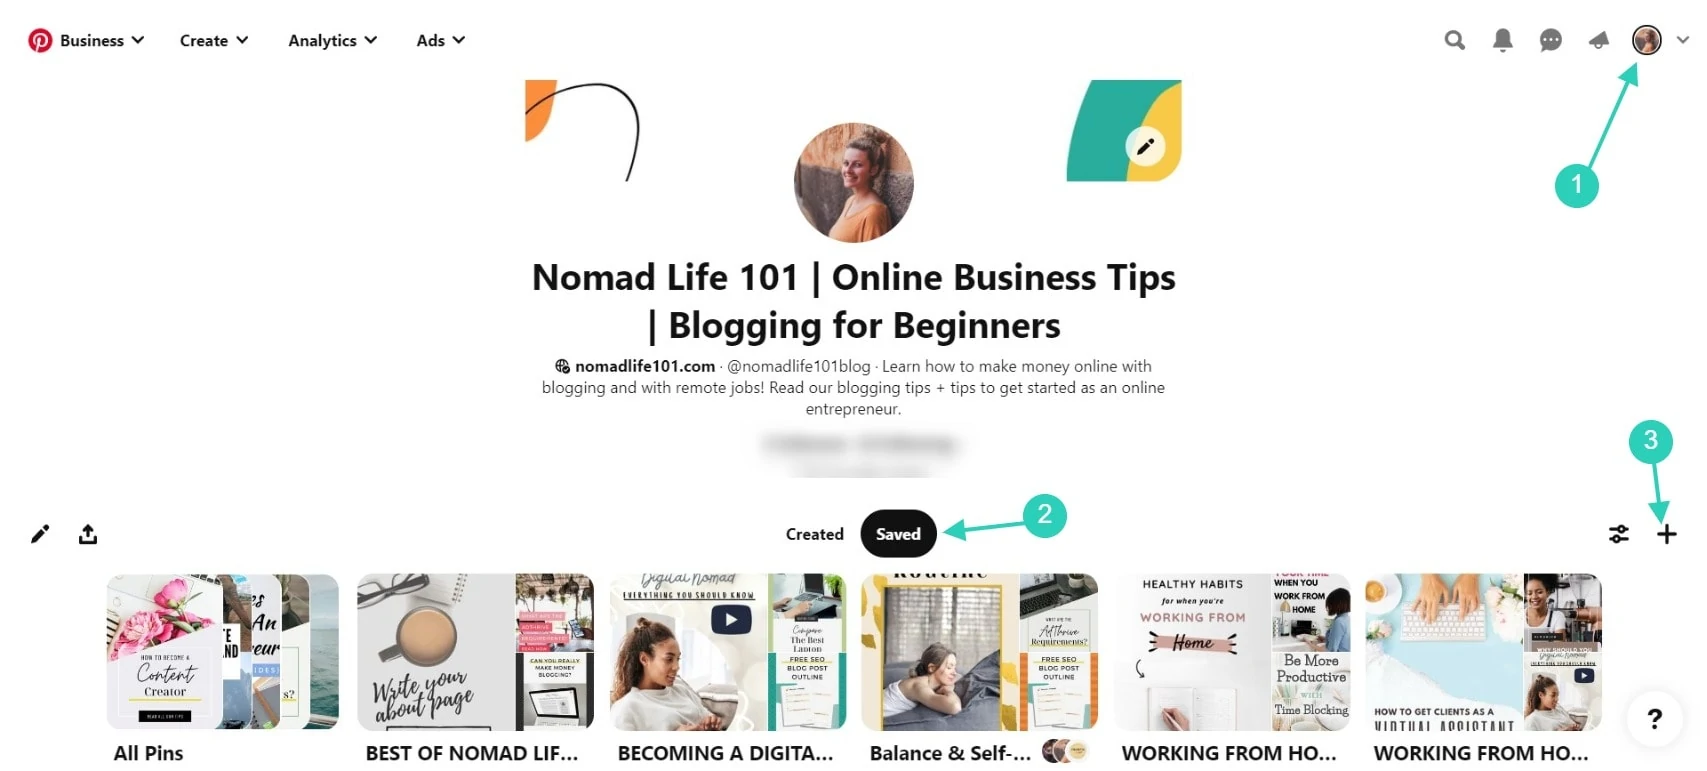
To create a board, click on your display image in the top right corner. You’ll be redirected to your profile page.
Click on Saved and the page will reload. Then, click on the + sign. You’ll see a dropdown menu that says Create Pin or Board. Click on Board.
Write down the name of the board and click on Create. You’ll see relevant pins if you wish to pin them to your new board.
Then click on your board and you’ll be redirected to the board. Click the 3 dots at the top and select the first option Edit Board.
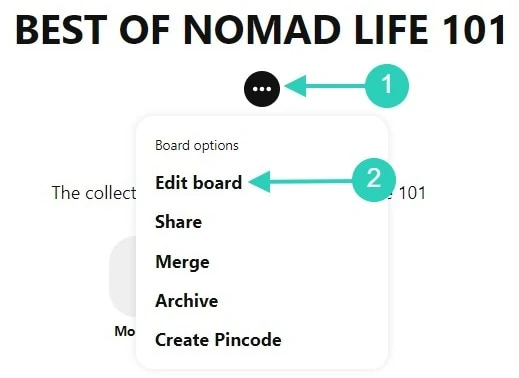
You’ll find options to add a board cover, name, and description. You can also add collaborators if you wish to invite bloggers to pin into your board. The important things here are the name and description. You should include relevant keywords there.
Repeat this process with all your main categories and if you need ideas, go see the accounts in your niche and think of boards you could also create.
Create Pins
The next step is to create pins. According to Tailwind (Pinterest official partner), the recommended size for pins is 1000 x 1500px with an aspect ratio of 2:3. Photo size should be a minimum of 600 x 900px.
To create pins, I usually use Canva Pro. They have Pinterest templates, or you can create your images from scratch.

Pinterest loves fresh content, so it’s a good idea to create multiple pins for each blog post you write. Now, let’s see how to post on Pinterest.
Start Pinning
There are three main ways to upload Pins to Pinterest.
- Pinning from your blog
- Uploading Pins to Pinterest
- Uploading Pins via Tailwind
Let’s see how you can add pins to Pinterest using these three methods.
Pinning from your blog
The most popular is to pin directly from your blog. To do so, you’ll need to upload your Pins and add them to your blog post. You can do so for 1-2 images, but you don’t want to spam your readers with multiple pins across your blog post.
To pin from your blog, you can either use a social media sharing plugin or download a pinning Chrome extension like the one by Pinterest or by Tailwind.
I personally don’t use this method because I prefer uploading pins directly to Pinterest – although your readers could help you go viral on Pinterest by pinning from your website too.
Uploading Pins to Pinterest
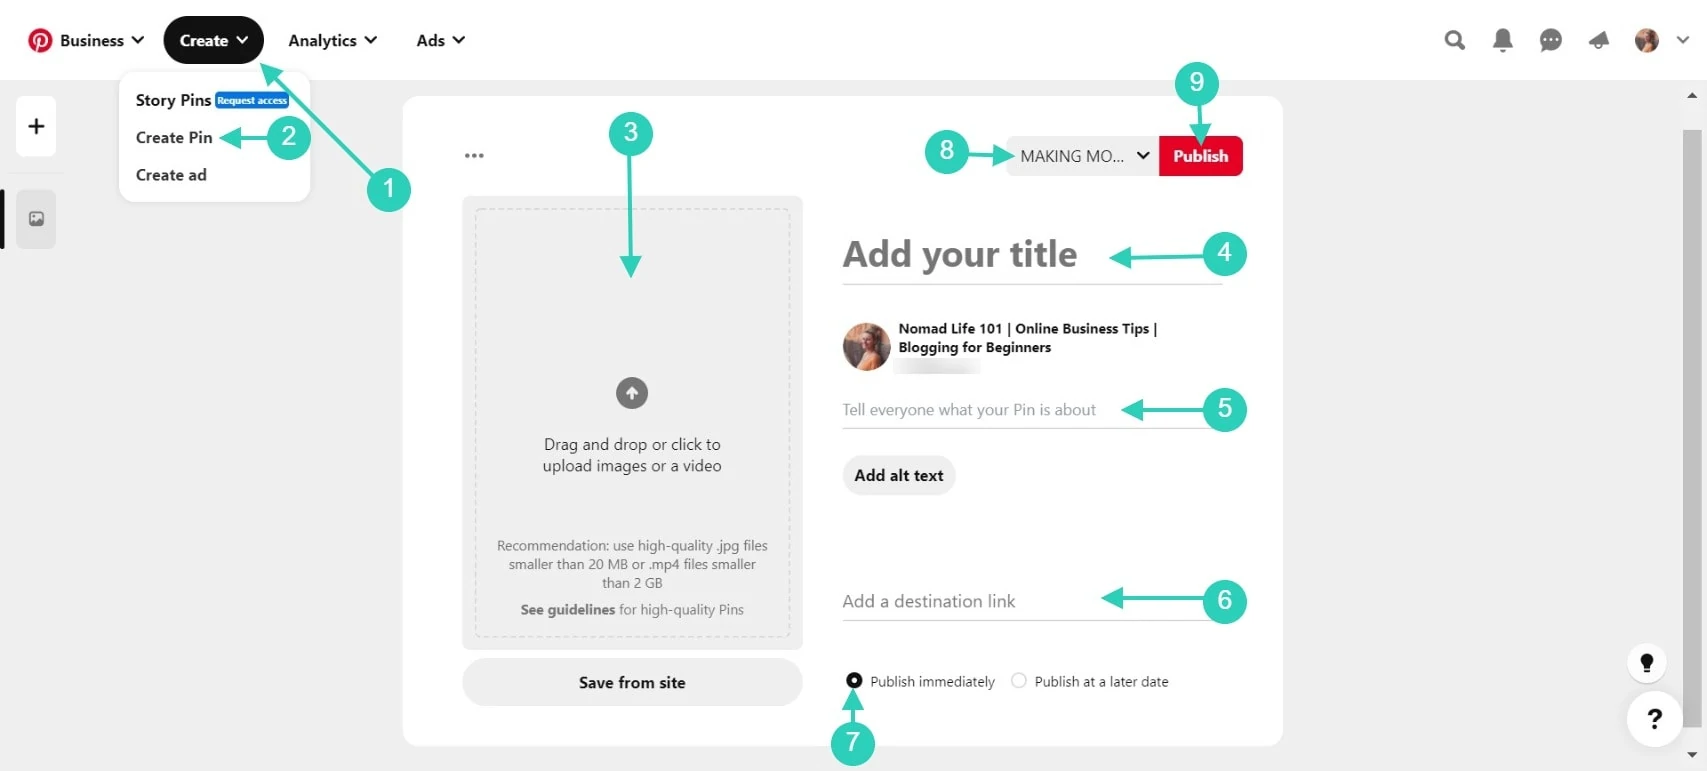
If you create multiple pins for each blog post, you’ll want to upload certain pins directly on Pinterest too. To do so, go to your Pinterest account and click on Create in the menu. Select Create Pin.
Upload your Pin image and add a title, description, and link. Select a board in the top right corner and click on Publish.
Alternatively, you could also schedule a pin at a later date.
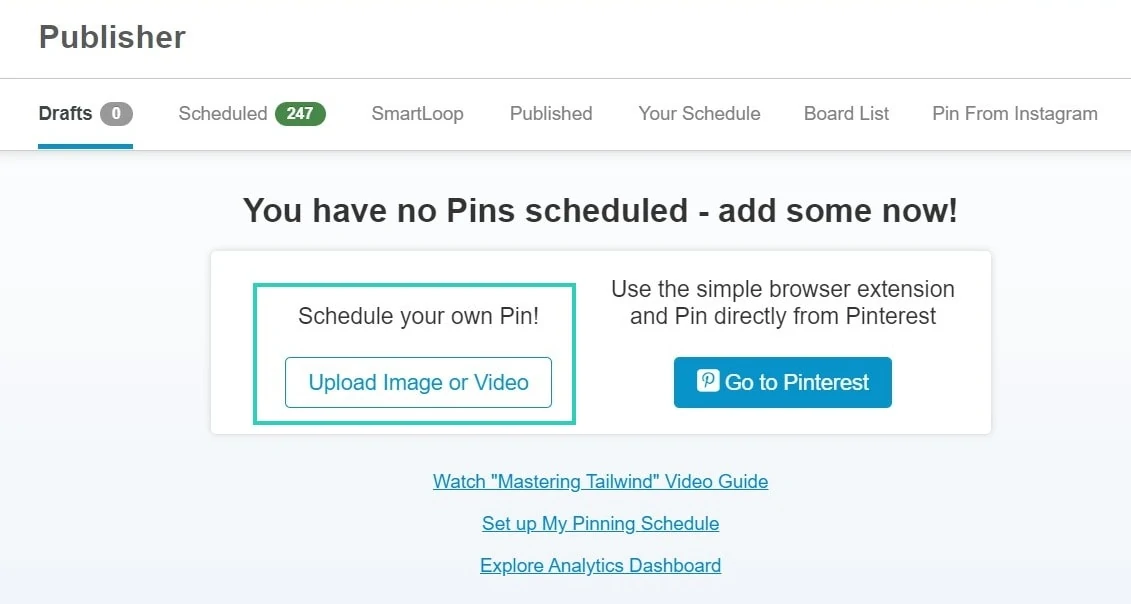
Uploading Pins via Tailwind
Finally, you could also upload pins via Tailwind. I use this option on my main website to upload pins in the future.
I upload the images in the draft section, write down a title, a description, and a link and I select all the boards on which I want to pin the image.
It doesn’t work as well as live pinning, but I do this in bulk.
Scheduling Pins
Now, you may be wondering if you can pin your images on several boards. In the past, we were pinning images to dozens of boards and it was working well.
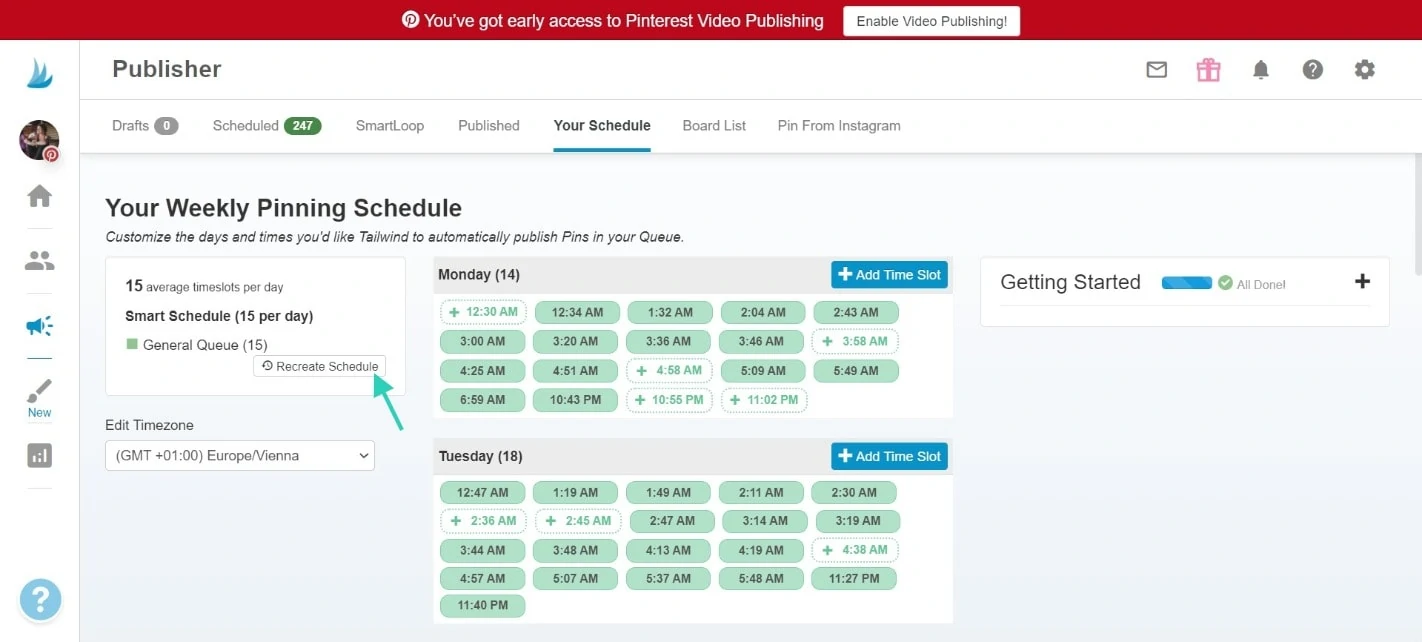
Now, Pinterest changed its best practices, and I only pin my images to relevant boards which is usually between 3-5 boards. I use a delay of 5-7 days between each board. To do so, I use Tailwind – which automatically creates a pinning frequency for me.
Tailwind also recommends the best time slots to pin. You can update the schedule once a month to ensure your schedule is optimized.
Alternatively, you could schedule your pins directly on Pinterest by selecting the option Publish at a later date.
Pinterest Top Tips For Bloggers
If you want to generate more traffic from Pinterest, here are some useful tips:
- Encourage your readers to save your images on your website by using a social media sharing plugin. (I don’t do this because these plugins slow down websites and my site speed is more important to me.)
- Follow other bloggers in your niche so you can also pin their content. By pinning popular pins, you’ll increase your number of total impressions on Pinterest.
- Get rich pins to make your pins stand out. Follow these instructions to get rich pins.
- Do Pinterest keyword research to optimize your pin titles and description.
- To automate your Pinterest, I’d recommend you sign up for Tailwind. This tool helps you automate tasks like scheduling and you can also participate in Tailwind Tribes to grow your blog traffic. I’ve been using Tailwind for several years now and it helps me save time. While I use and recommend the Pro plan – you can still grab the Forever Plan that allows you to pin 20 images per month.
Final Thoughts On Pinterest For Bloggers
Finally, Pinterest can be an incredible source of traffic for your blog. Remember that consistency is key and that Pinterest loves fresh content. That said, you should be pinning every day, and if you don’t wish to do it manually, consider investing in Tailwind.
Pinterest is a visual search engine, and creating beautiful images is not always easy. That said, if you’re not a good designer, consider using the templates by Canva Pro or buy Pinterest templates that you can easily edit.
That said, Pinterest constantly improves, and it can be hard to keep up with the latest best practices.
You can join a Pinterest course like Passive Profit With Pinterest to learn how to use it to increase your blog traffic and sales.
Learn more about blogging by reading one of the following blog posts: