When I heard about web stories, I wasn’t sure if I should get into a new thing again. Until I realized that web stories could drive significantly more traffic to my blogs. When I heard bloggers mentioning their success with Google web stories, I got curious.
After a quick research, I decided to try web stories and see for myself. I gave myself a mission to create 5 web stories for 2 different sites to see if it would be worth a try.
At first, I didn’t get any views until I figured I was doing something wrong. (Ahem – a few things, actually.) So, after fixing a few mistakes, I’m happy to say – web stories work.
In this post, I’ll share tips so you can create your own web stories to increase your blog traffic. I’ll share the exact steps I use myself and I’ll include ways to fix the common mistakes so you can see faster results.
How to Create Web Stories the Easy Way
Step 1: Install the Web Stories Plugin.
If you use WordPress, the easiest way to get started with web stories is to download the Web Stories Plugin.
Once the download is completed, you can get to your WordPress dashboard. Click on Plugin > Add New > Upload Plugin.
Once your plugin is uploaded and activated, you’ll see this page.
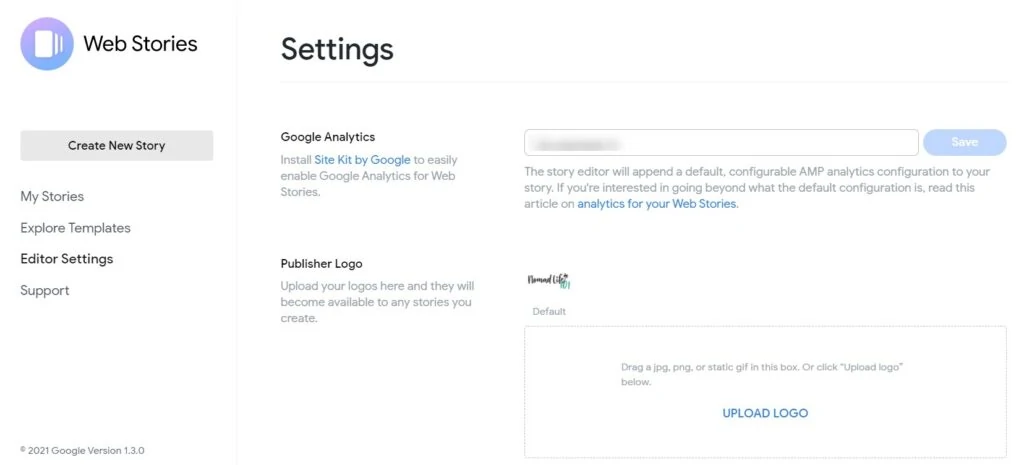
Step 2: Upload Your Logo
The first thing to do is to upload your logo. You’ll see that the logo should be at least 96×96 px, and in a perfect square. It also says that the logo should not be transparent. Although, mine are and it seems fine so far.
If you don’t have a logo that fits the size recommended, head to Canva to resize your logo or create one.
Step 3: Set Up Web Stories Analytics
Web stories don’t necessarily count as blog views. It was recommended by Mediavine to create a new profile ID for your web stories. By doing so, you’ll be able to see both analytics separately.
If you’re displaying ads on your site, you won’t want to count the web stories towards your number of sessions/views, since it could hurt your RPM calculation.
You can easily set up a new Google Analytics profile by heading to your Google Analytics.
- Go to Admin > Property > Create Property.
- Create a name for the property. For example, you could write Web Stories. Then, click on Show Advanced Options so you can enable the option that says Create a Universal Analytics property.
- Enter your URL for your web stories. Usually, it goes like this: yourwebsite.com/web-stories.
- Select the second option that says Create a Universal Analytics property only and click the button Next.
- Then, you’ll have a couple of questions regarding your business. Answer them and click on Create.
- When the new screen loads, you’ll see a new tracking number at the top left. Copy it and paste it in the Web Stories Plugin > Settings.
Step 4: Create a Web Story
You’ll have two options to create a web story. You can either pick a template by clicking on Explore Templates or you can click on Create New Story to create one from scratch.
My first web story was created with a template, and eventually, I created my own stories.
So, let’s start with the options/features so you can understand the different functions to create a web story.
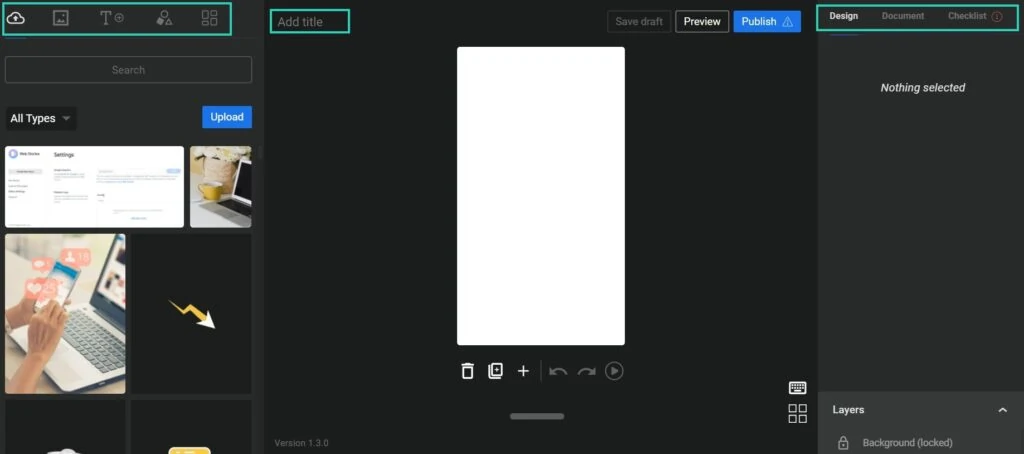
In the left sidebar, you’ll find your recent uploads. You can use the search bar to find images quickly.
Next to the upload icon, you’ll find Stock images and videos.
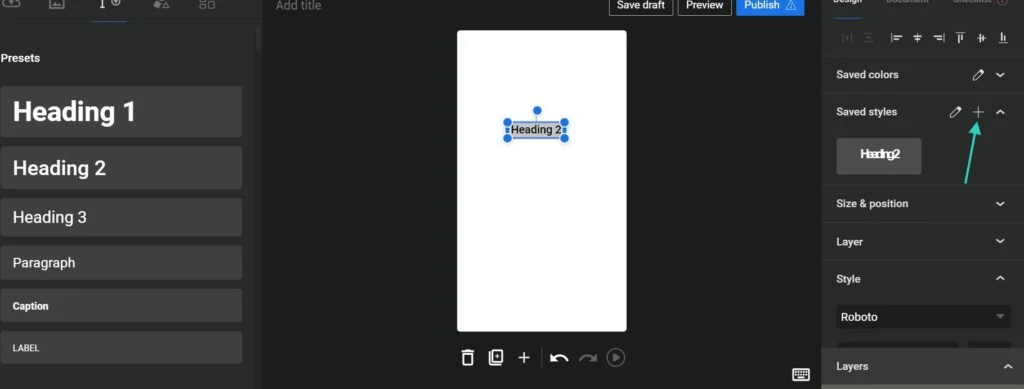
The next icon is for texts. You can either pick Presets or Text Sets. You’ll need to scroll down a bit to see the Text Sets options. When you select your pick, you’ll see options on your right sidebar including fonts, size, alignment, and more.
You can play around and create a special type of text. To save a text style, you can click on the + icon located next to Saved styles. That said, when you add a new text you can click on your saved style to change the text automatically.

The next icon is for shapes. This can help if you want to create special designs.
Finally, the next icon will bring you to different types of templates. You can select one instead of building one from scratch.
Whenever you add an image or text, you can move them on the page, and add an animation which is found in the right sidebar. Each element can become clickable. You can add a link in the right sidebar.
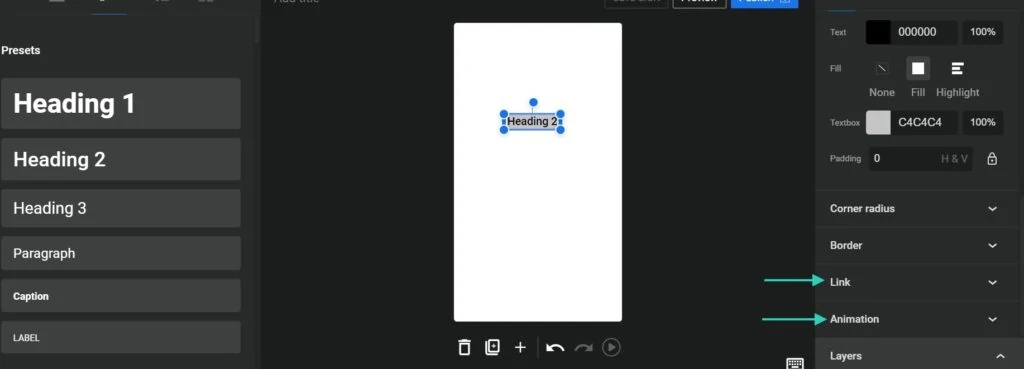
If you’d rather use the whole page as a clickable element, you can select the background and add a link in the Page Attachment. You’ll be able to write your own call-to-action there too.
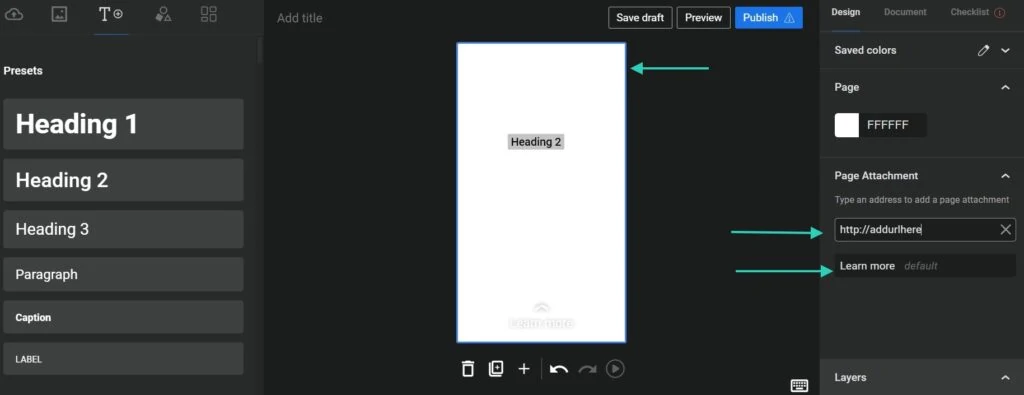
In the middle, at the top left, you have a spot to add your title. This step is crucial.
Then under the page, you can see icons to delete a page, to duplicate a page, to add a new page, to undo/redo, and to play the current page.
On your right sidebar, you’ll find all the functions to design every element. In the second tab, you’ll see Document.
Make sure to add a Cover Image and a Story Description. You can also change the slug if needed there.
The size required for the Cover Image should be 768×1024 px.
Finally, the last tab is called Checklist. This section could point out errors to fix or recommendations including the best practices.
Step 5: Publish a Web Story
Once you’re happy with your story, you can click on Preview and Publish it.
Step 6: Verify Your Web Story
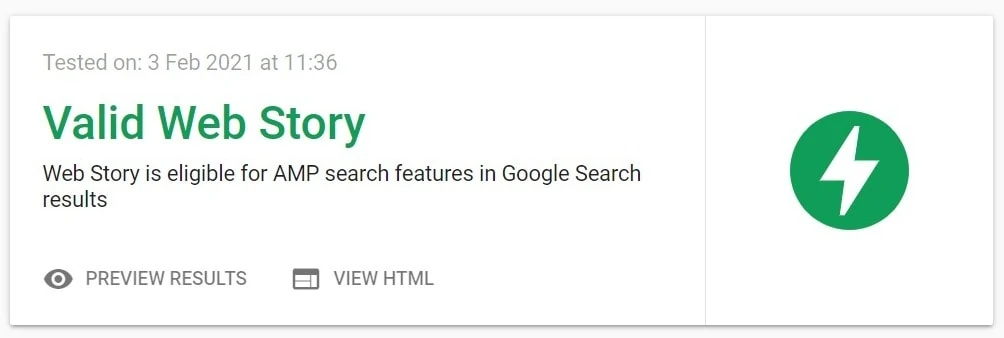
Copy the Web Story URL and click here to test your story. Paste the URL in the bar and then, if everything is fine, you should see this message.
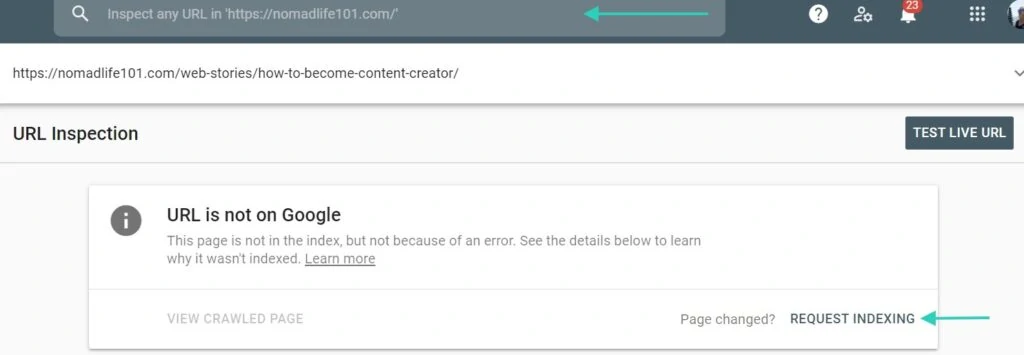
Step 7: Index Your Web Story
Head to Google Search Console and in the bar at the top, paste the URL again. You can click on Request Indexing.
How to Avoid (And Fix) Common Web Story Mistakes
When I first created web stories, I didn’t get any traffic for the following reasons:
- My cover images were the wrong size.
- My stories were not indexed.
- My stories were not validated.
After speaking to blogger friends, I realized I needed to fix the cover images and I could speed up the process by verifying that the story was valid and index it. The next day, I was already seeing the results.
Web Story Results
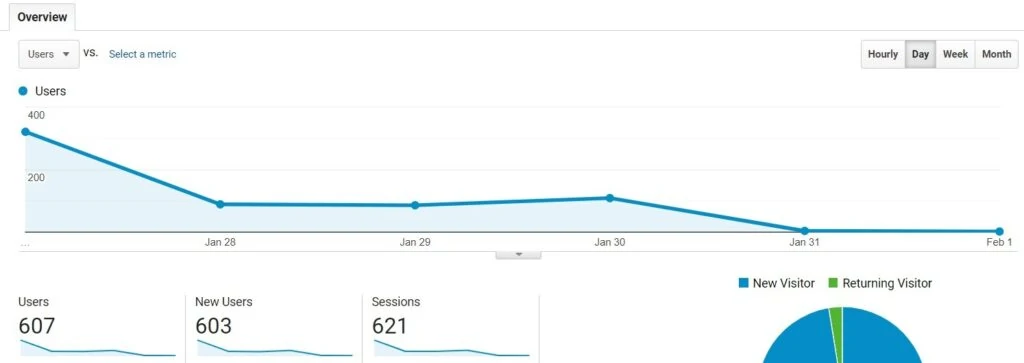
So, after creating stories for two websites, here’s what happened. I had a huge spike in traffic for a few days, and then, the traffic went down.
It showed me what kind of blog posts work better and I experimented with different story styles.
Now, you must keep in mind, that not all story views will convert into pageviews on your blog. The user must click on something to visit your website.
Website #1:

Website #2:
Final Thoughts on Web Stories
Are web stories worth it?
Well… In the next few days following the creation of web stories, I was happy with the new spike in traffic. It showed my content to new readers and it was a great way to reach a new audience.
But it’s a lot of work, and it’s not a sustainable way to get traffic long-term. You would need to create new web stories regularly to get more results.
Depending on your blog niche, it may be a good idea – I think some niches definitely can do better than others. For example, my travel blog had more traffic than Nomad Life 101 – which has a specific niche.
There are rumors like what the traffic could spike again here and there. Eventually, you could get ongoing traffic from it – but we don’t have enough information on this yet.
If you’re looking for a new way to get traffic, give web stories a try. Although, if you want to get traffic long-term without having to work constantly, I’d suggest you implement SEO strategies. You can learn more about SEO with our online course SEO from Scratch.