Freelancers are often called upon to wear many different hats. As a team of one, you have to be the accountant, marketing department, IT team, business development manager, and CEO of your business.
This means you have to make all sorts of decisions you probably never even thought about when fantasizing about working for yourself and all the perks it brings.
Whether you’re a content creator, communications consultant, or copywriter, you might be thinking you’d be spending the majority of your time doing all those things you specialize in… however the reality is very different!
The process of actually running, growing, and nurturing a business takes up a lot more time.
This is where Xolo comes in! While Xolo is great for solopreneurs to actually start your business, for people who already an entity in place, it’s also a great tool to ensure that your finances are running smoothly and you are able to manage payments in different currencies.
Read on to learn how Xolo works.
What is Xolo Go?
Xolo Go is an online platform that helps freelancers to start a business without having to actually register a company. It allows you to:
- Invoice customers in the EU and beyond through a professional system
- Track your finances
- Apply business expenses against your income, thus potentially lowering your taxes
- Remove the costs and hassle of opening a company on your own
- Link your EUR / SEPA bank account and receive payment in different currencies
- Disentangle your business and personal finances
Xolo Go helps thousands of entrepreneurs from across the globe and is great for people who plan to operate as a one-person professional services business such as:
- Translators
- Management consultants
- Marketers
- Web Designers
- Software developers
Really, the list is pretty endless, although it’s important to note that Xolo Go wouldn’t suit businesses involved in buying and selling physical goods and they don’t support business activities requiring a license, such as financial services, travel agencies, or gambling.
The pricing side of things at Xolo Go is easy to understand as well. Basically, there are no setup or ongoing fees so you can get started straight away. The only fee is simply 5% on each invoice you submit through the platform, which is only payable when you make a withdrawal from your Xolo Go account. For the service and peace of mind they give you, this seems like a winner to me!
How Xolo Go Works
Step 1: Pick a Xolo plan
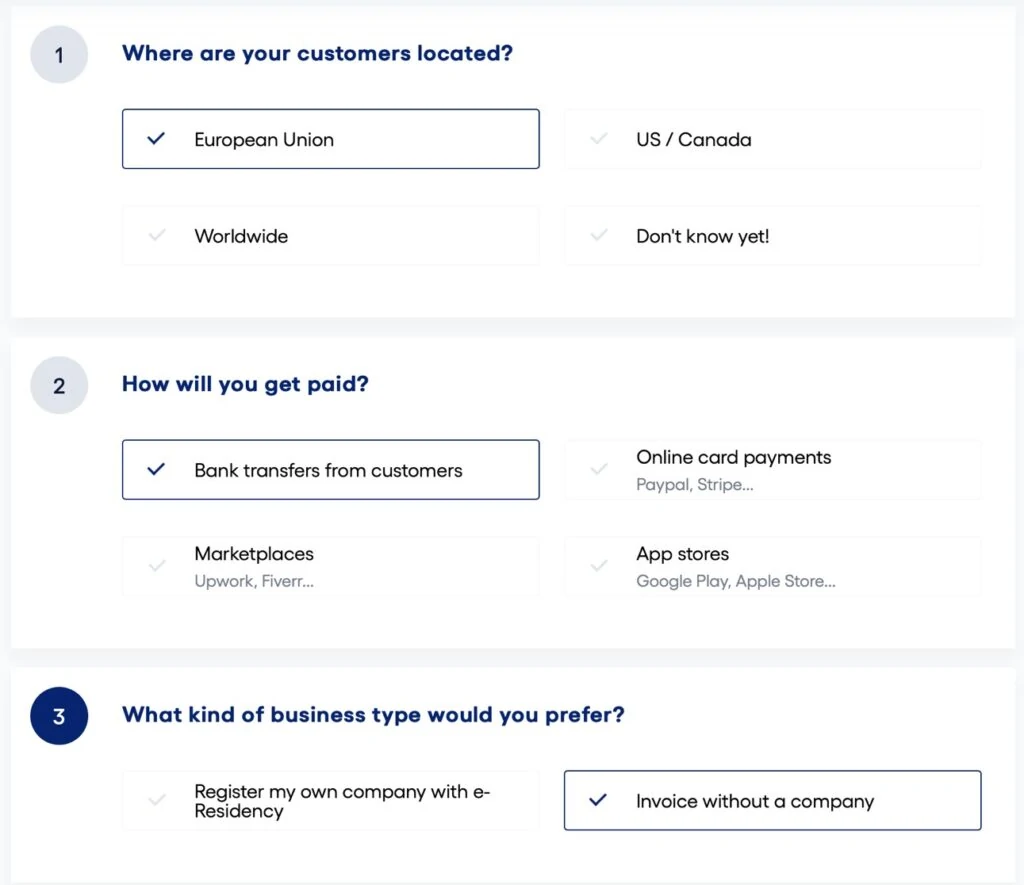
The first step is to choose between Xolo Leap and Xolo Go. Depending on your situation, it may be an obvious choice. Xolo has a useful little ‘survey’ to help you decide which option suits you the best. In this post, we are focussing on Xolo Go.
Step 2: Create & set up your account
Once you’ve selected Xolo Go, then you’ve got to input a couple of simple details about who you are, and then you’ll receive an email so you can verify your account. And that’s it – you’re in!
The first task to do is to set up your personal profile – again, just standard details required like your address and business sector.
Then you’ll need to add your bank details and link your EUR/SEPA bank account. This can be especially easy if you already have a Wise account (and if you don’t already have one of the marvelous digital bank accounts then do it immediately!). You can even set it up via their link so you could quickly and easily set up a Revolut or Wise account.
Step 3: Verify your account
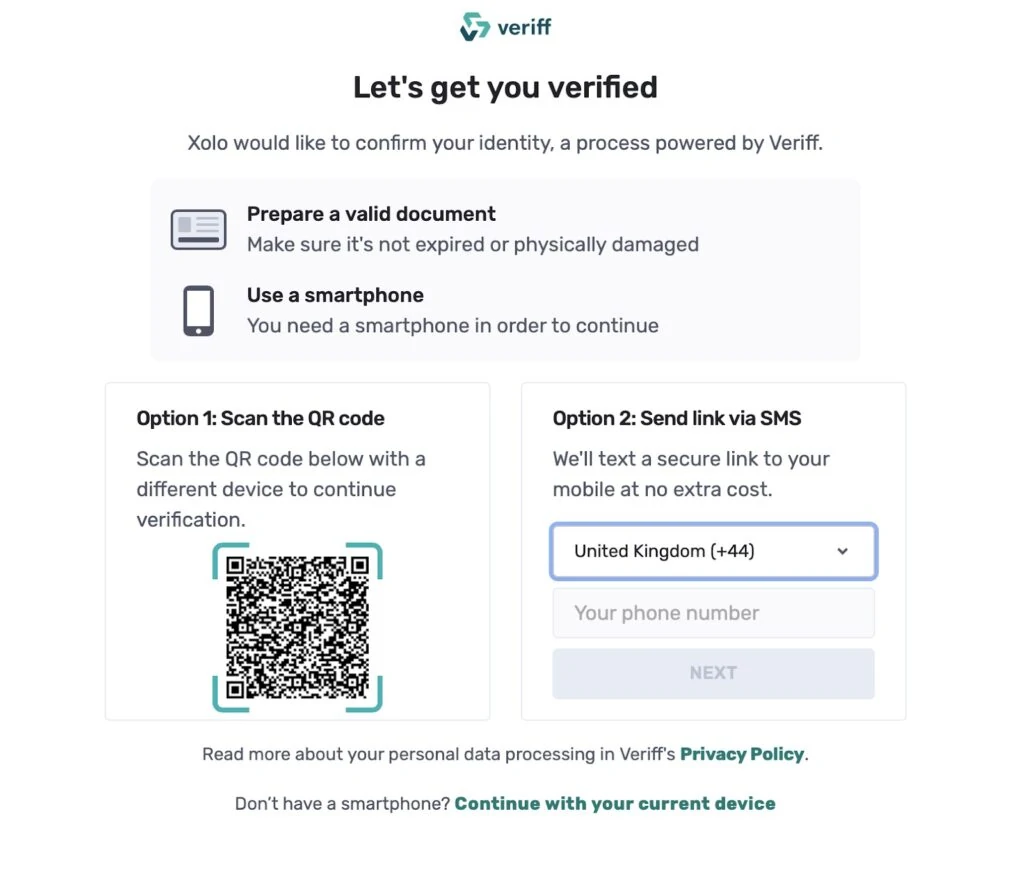
The next step is digital identity verification. Xolo Go is partnered with another Estonian digital leader – Veriff – and the process is seamless! They start by telling you what you need before you start so there won’t be last-minute scrabbling around for documents (like a driver’s license) and then the verification process is automated and can be done quickly.
Once that’s done, you’re officially registered and ready to roll as a brand new Xolo Go client!
Step 4: Set up clients and create invoices
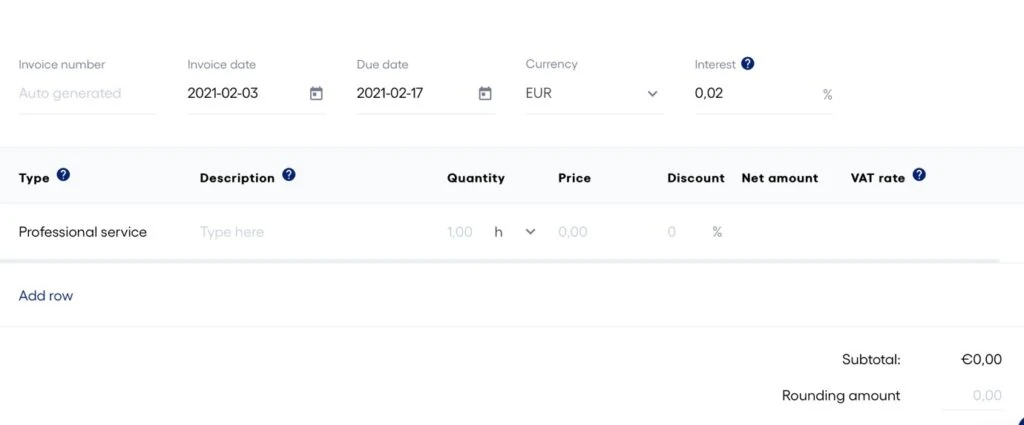
You can go ahead and start setting up your client and invoices. The first thing to do is to ‘create a customer’ – all you need is the company name, address, contact name – basically all the details you would include on any invoice you sent out anyway. Once you have a customer logged on the system, you can create your invoice by inputting all the figures and detail you would want your customer to see.
As an unexpected extra, you can even personalize the invoice and the email that accompanies it. This means you get to have a personal relationship with your clients, with a friendly email alongside the professional invoice.
When setting up the invoice, you’ll notice that Xolo Go is entirely designed around supporting freelancers however they can. They had helpful suggestions everywhere, even down to the late payment ‘add interest’ section. This is something that you could consider as a solopreneur. Seen as though late payments are one of the biggest issues that freelancers face, it seems like a great way to ensure clients stick to the ‘rules’ they’ve previously agreed to!
Finally, you can send the invoice.
Step 5: Get paid
The payment from clients is just as easy – You’ll receive a notification via email, the invoice in your account will be marked as paid, and the money will be registered on your balance sheet.
The final step is to withdraw the money to your personal bank account. You can simply access the ‘withdrawal’ section of your Xolo account, decide how much you want to withdraw, and click on ‘withdraw funds’…. And that’s it – the money will move immediately into your Wise account.
Final Thoughts
One of the negatives of being a freelancer is that you always feel very much alone in your business dealings and sometimes the ability to reach out to the ‘accounts team’ or ‘IT Department’ would be a welcome relief.
This is what it feels like to be part of Xolo Go – it’s like having your own personal accounts team who are watching your back and making sure things are processed correctly.
The platform also features great tools to help you with your expenses or specific client projects – keeping everything organized and easy to manage.


